HG Direct Contract Guide

Heavenly Greens — Sales Rep Quick Reference · every new HG Direct contract is built in AGM

1. Build Contract 2. Fill the Form 3. Create & Review 4. Approve & Send 5. Customer Signs 6. You Countersign 7. Deposit Paid
Open the full step-by-step deck (17 cards) →
Open the deck in Gamma Read it as a page below ↓

Quick Navigation

  1. Build the contract in AGM — from the contact record to a draft
  2. Send it for signature — two presses of Approve & Send; the second is the send
  3. What the customer does — Take me there, Confirm, Sign
  4. You countersign — your signing copy arrives when they sign
  5. The customer pays the deposit — automatic invoice with a Pay link
  6. What lands back in AGM — timeline, notes, Deposit Received
Costco contracts have their own track and their own guide — use the Costco Contract Guide tab above.

Chapter 1: Build the contract in AGM

From the customer's contact record to a draft you can send. Captured live on a test contract, 7 September 2026.

SALES REPOpen the customer's contact and press Build Contract

Contacts → the customer you just ran the appointment for. The top bar carries Change Order Form · Build Contract · View Installer Packet · Add Project Details · Service Request. Press Build Contract.
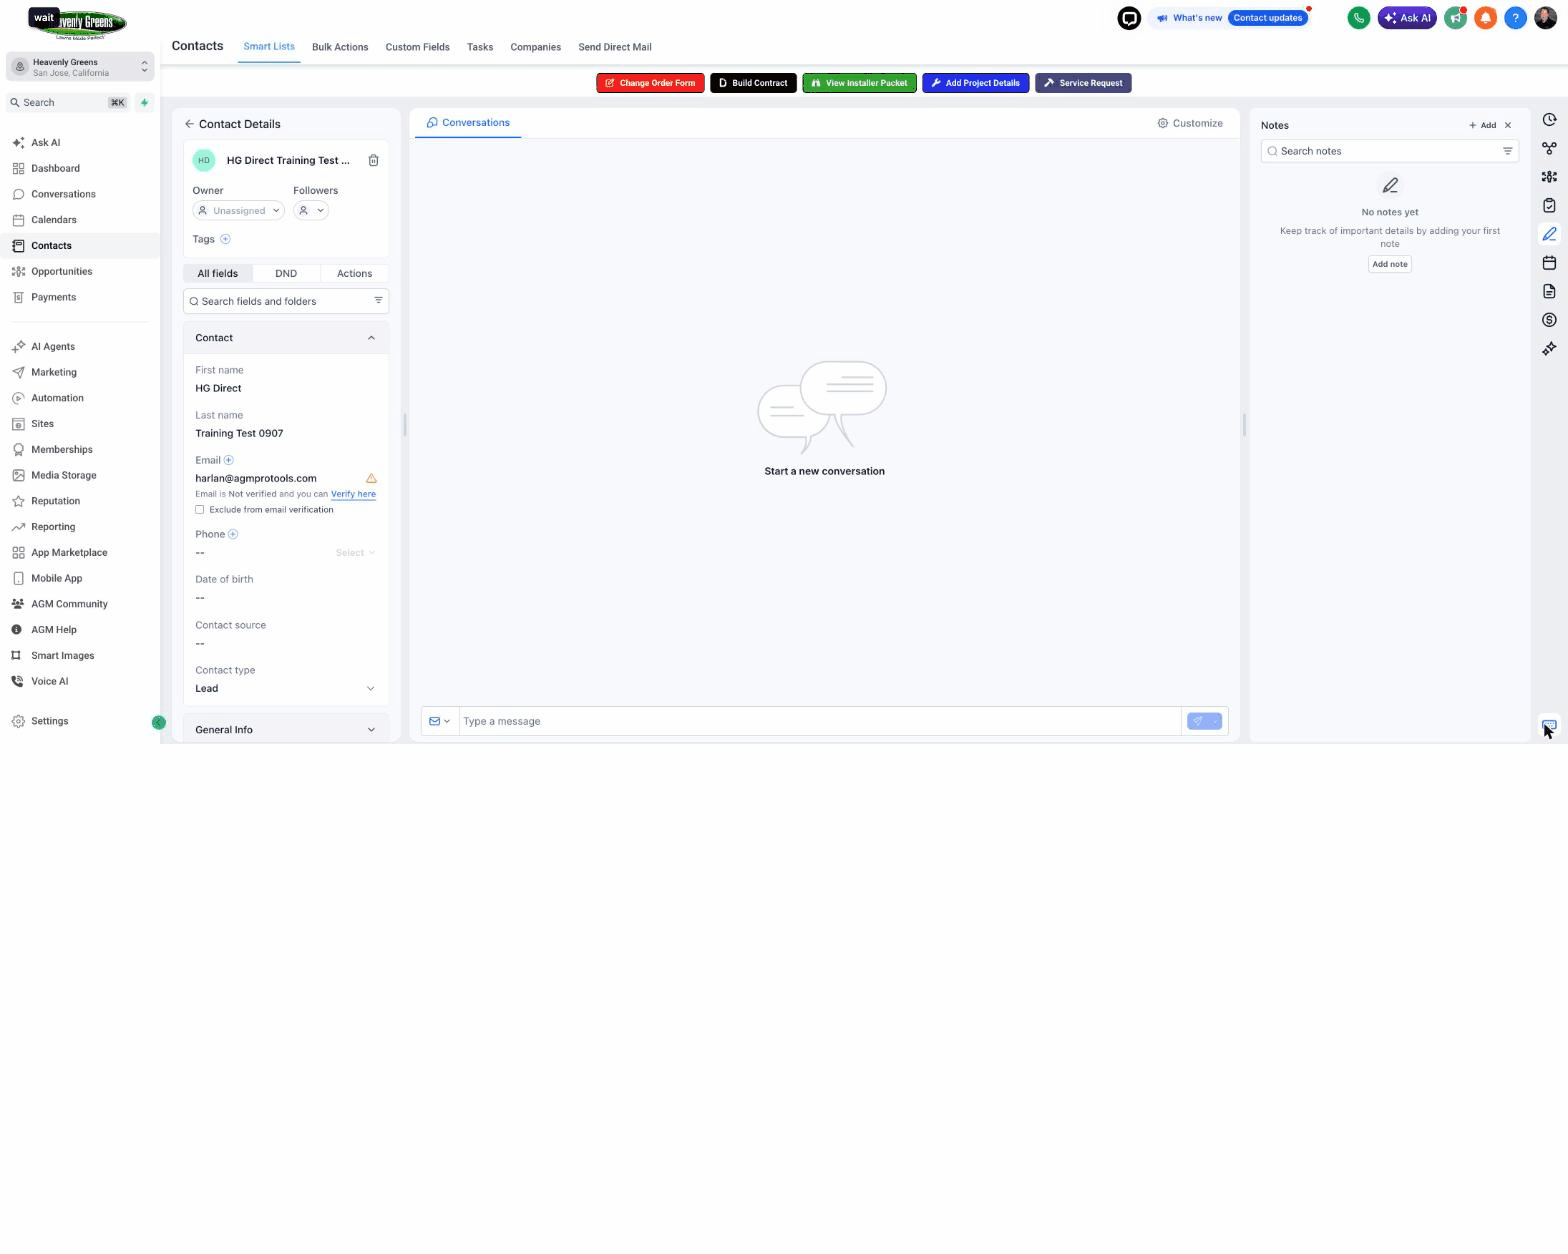
The contact record with the Build Contract button

SALES REPPick Heavenly Greens Direct

A new tab asks Which contract is this? Press Heavenly Greens Direct. Costco is the other track and has its own guide.
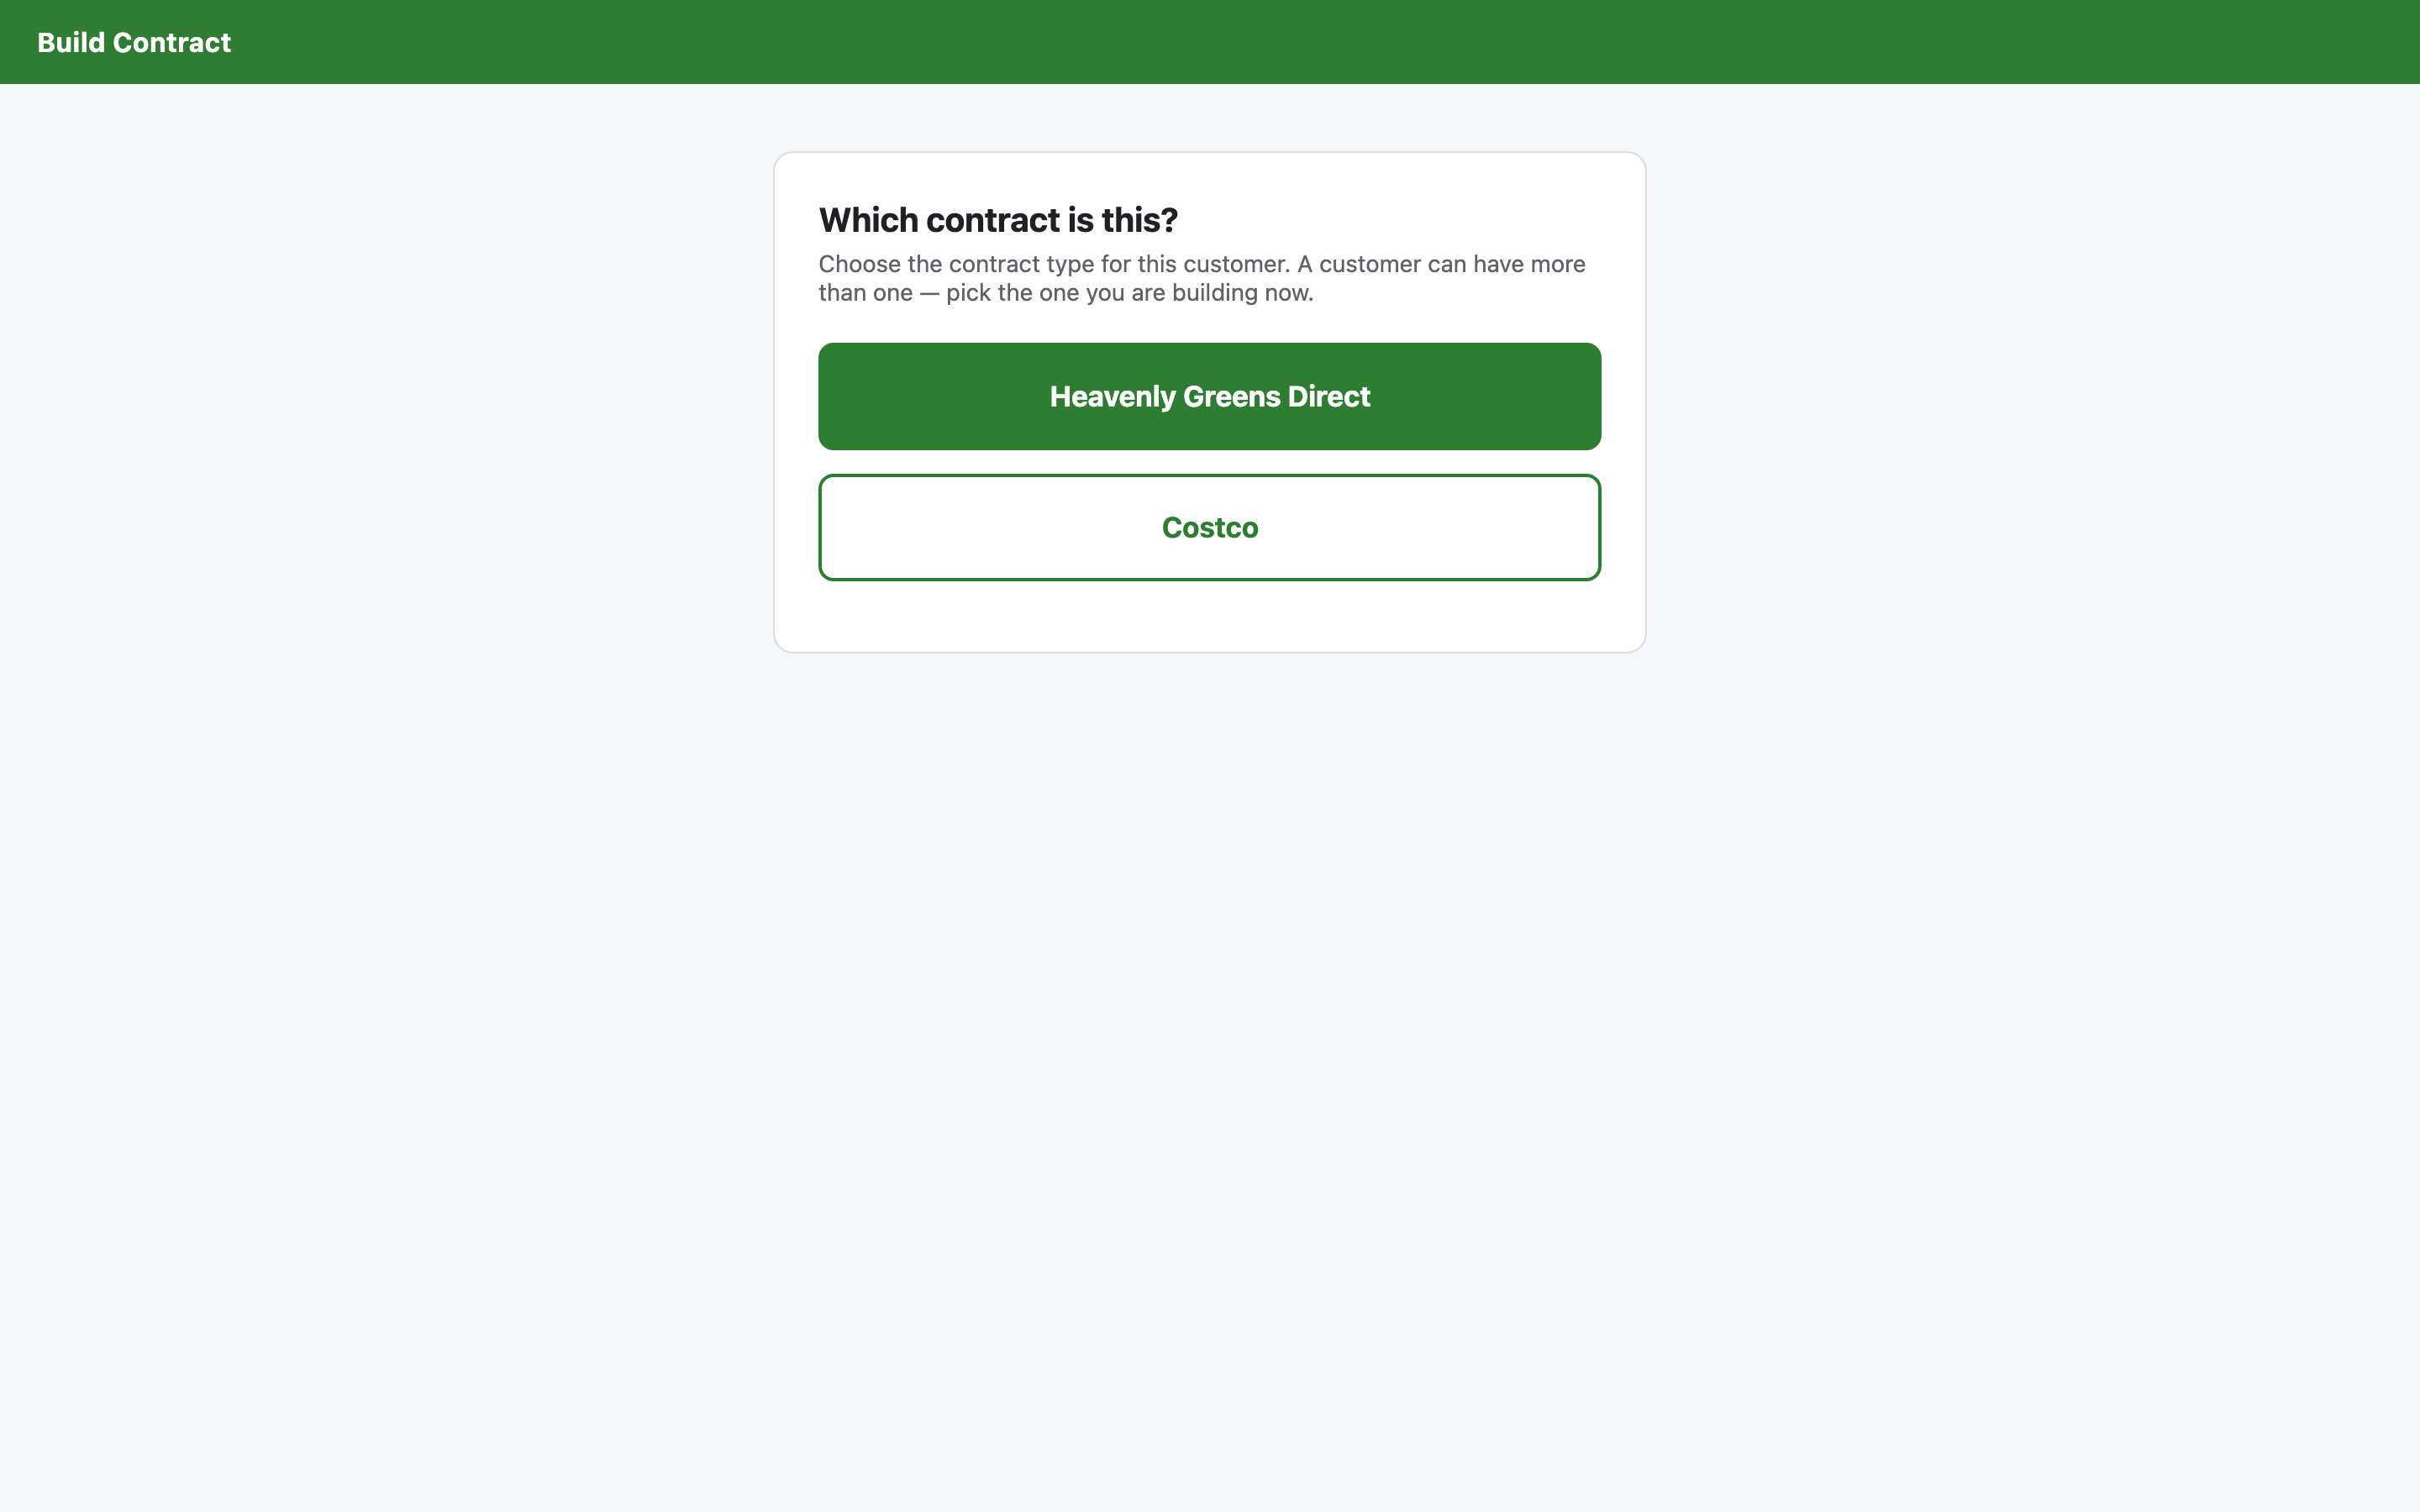
Which contract is this? chooser

SALES REPThe Build Contract form opens with the customer already filled in

Name and email come from the contact. You add Phone, Billing Address, City, Zip, and whether the job address is the same as billing. The Sales Rep block pre-fills from the contact's assigned rep — confirm it is you: that name prints on the contract and receives the signing copy.
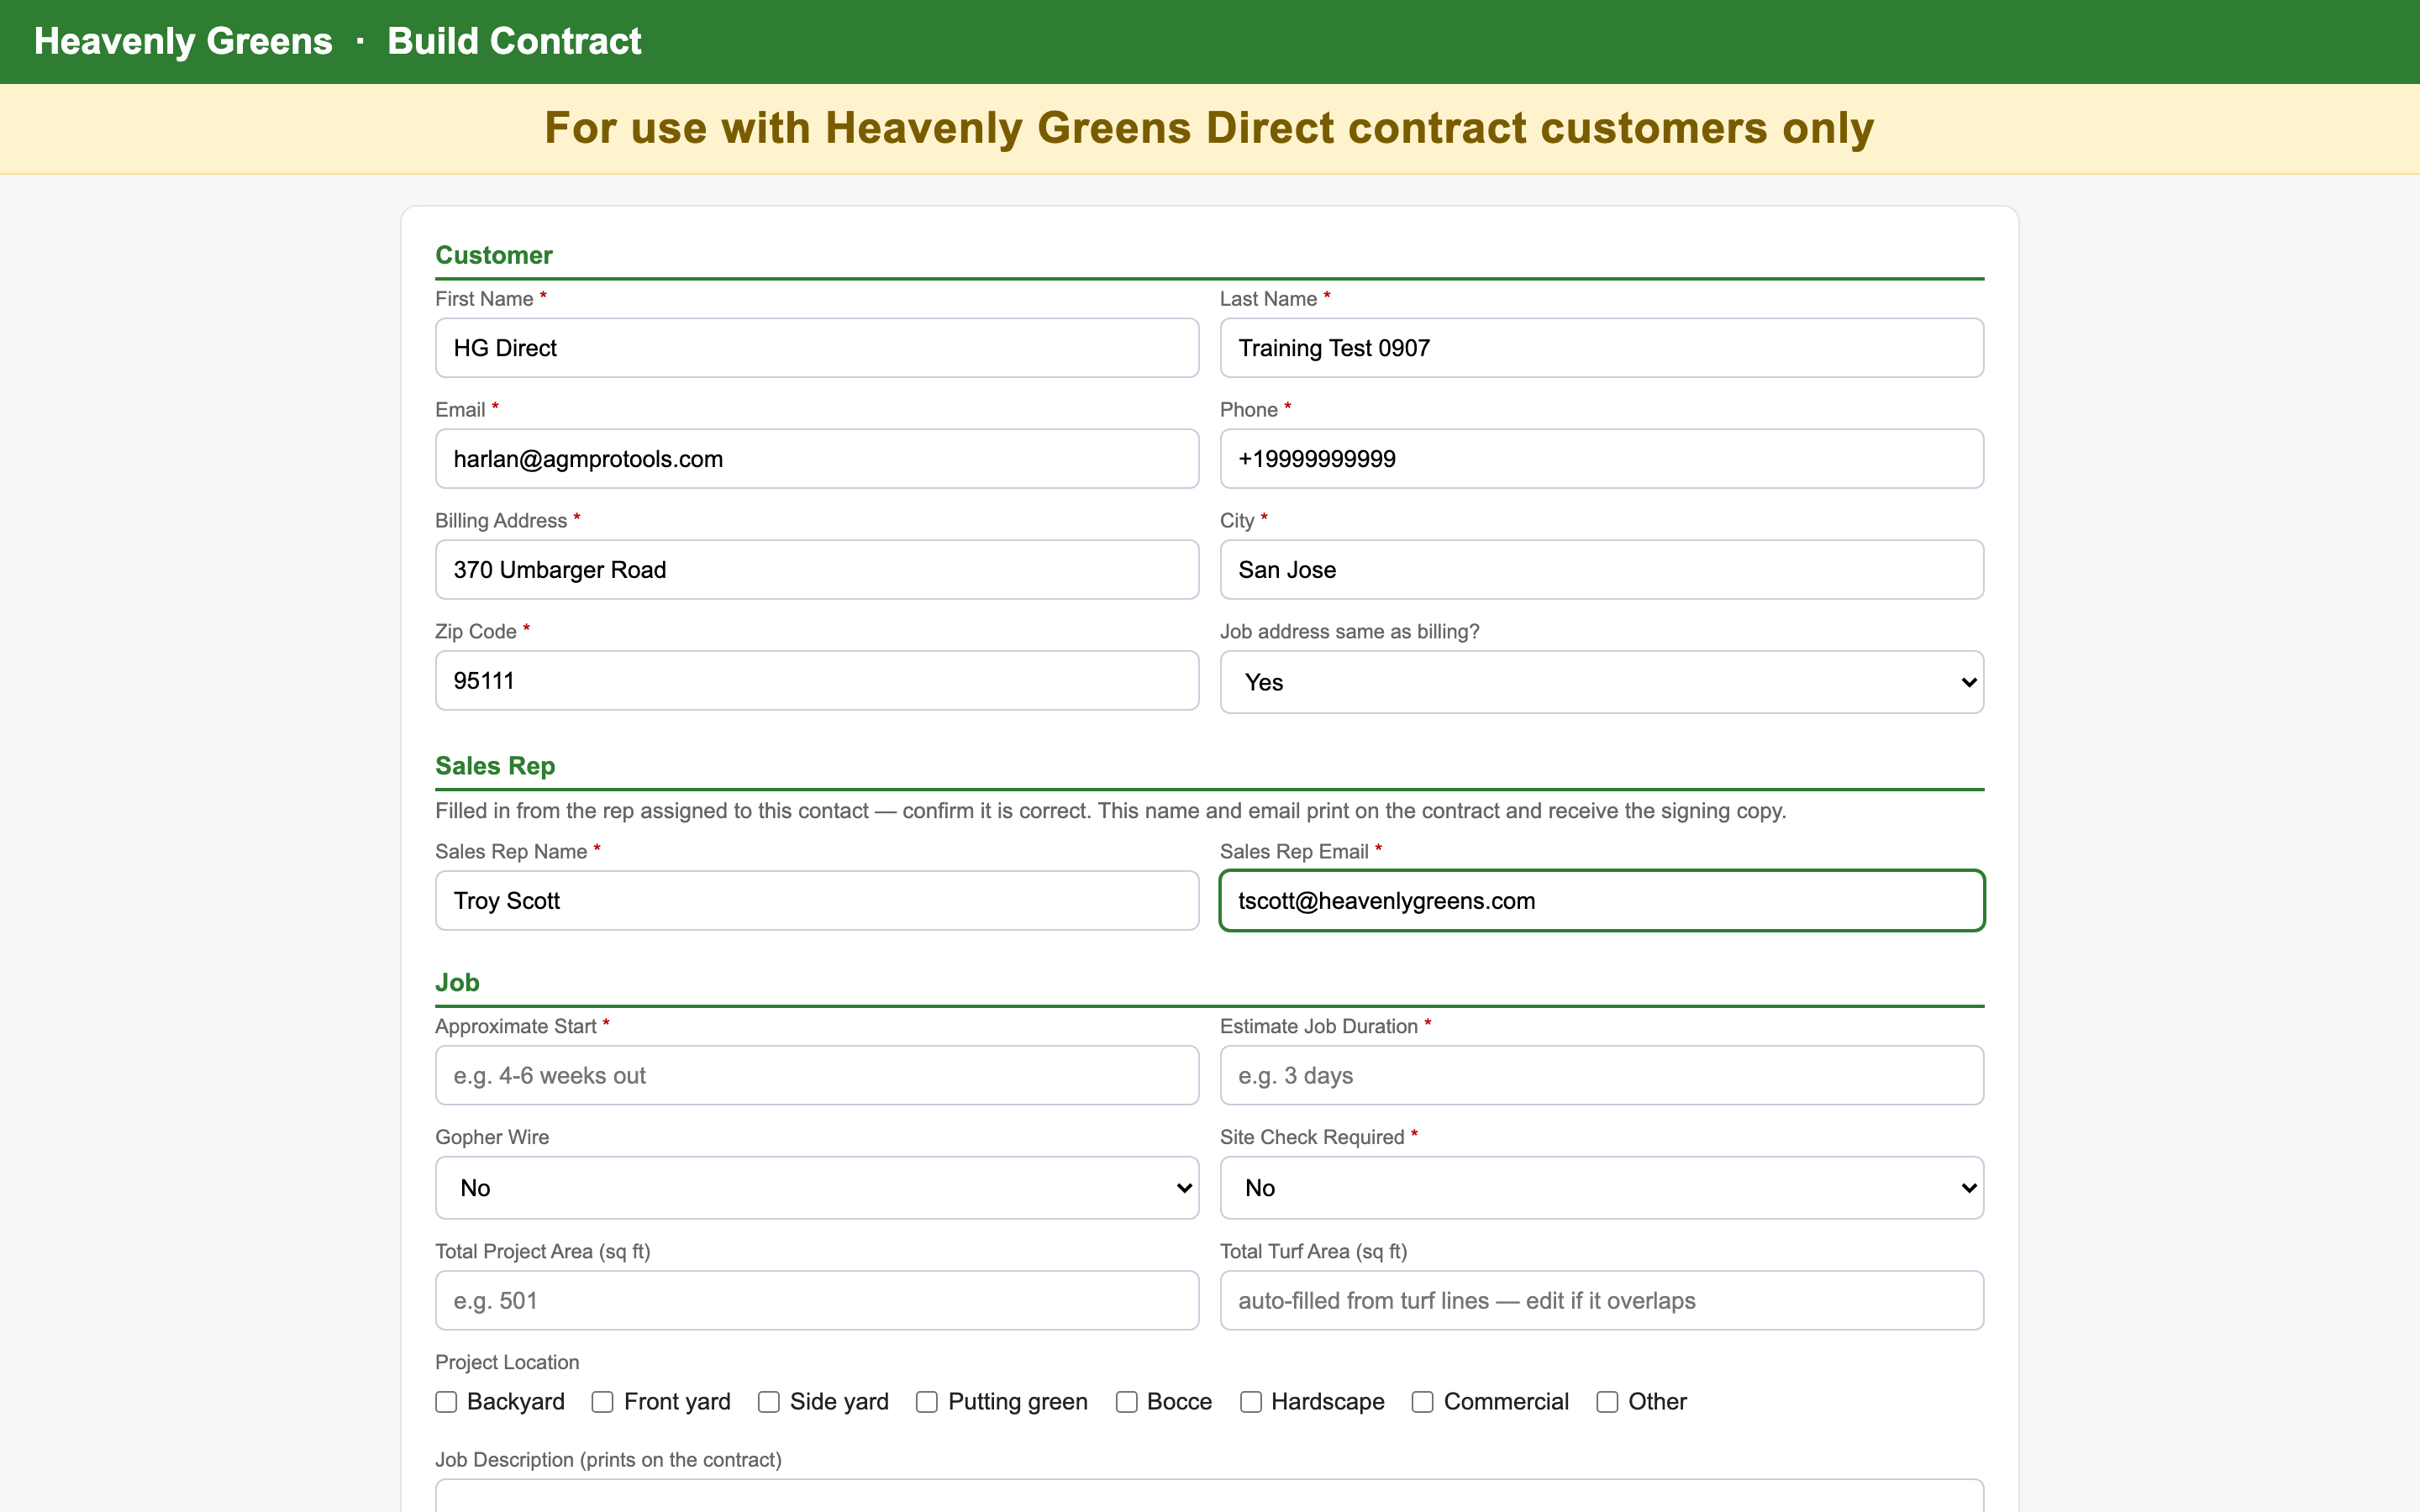
The form with customer and sales rep filled in

SALES REPThe job, the waivers, the products and the payment schedule

  • Job: approximate start (e.g. 4–6 weeks out), duration, gopher wire, site check, project area, turf area (auto-sums from turf lines), location ticks, and the job description that prints on the contract.
  • Waivers: tick every one that applies — they go to the customer automatically after full signature, never before.
  • Products & Services: Category → Product (frequently-used first; Write in a product… for anything else), Qty, Unit, Price, Warranty years. + Add line item for more. At least one line, total above $0.
  • Payment Schedule: the deposit is computed for you (California law: 10%, capped at $1,000). Pick Deposit Paid By, add any Materials / Start of Work / progress payments; Final Payment is the remainder. Read the totals box.
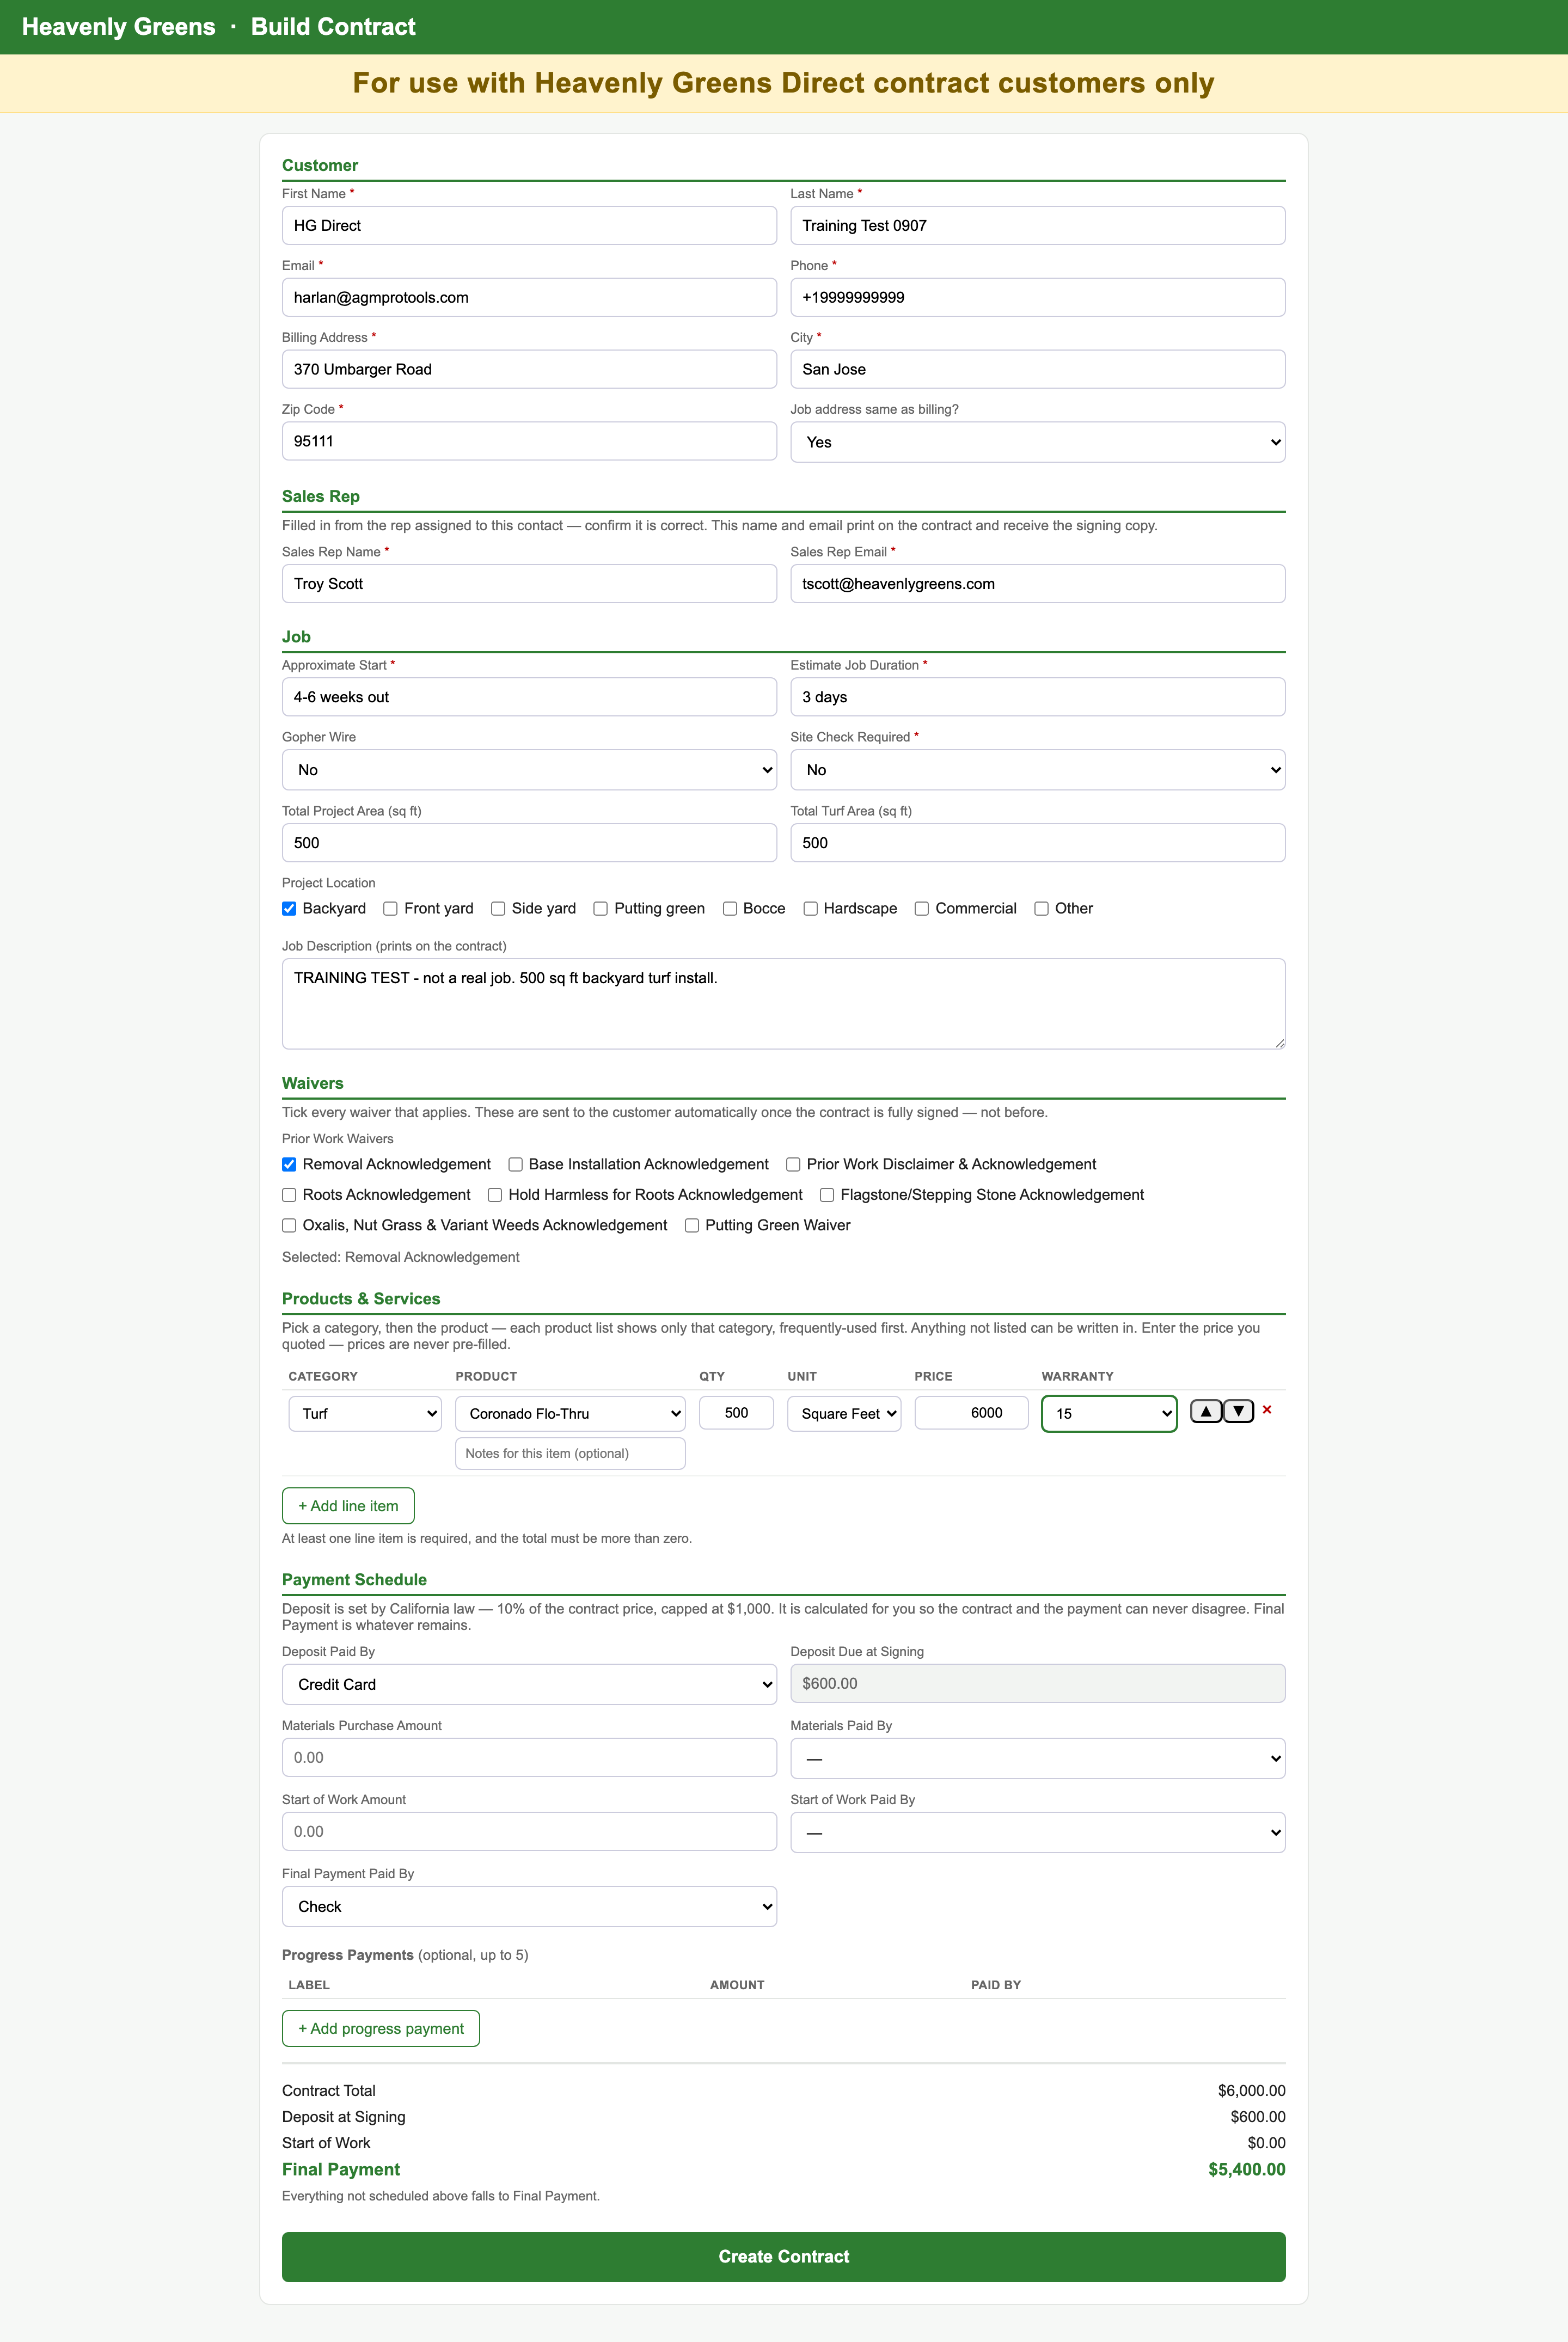
Price is the price for that line, not per unit. The form does not multiply Qty × Price. Type the amount you quoted the customer for that line.
The form filled in, before Create Contract

SALES REPPress Create Contract and review the draft

The page keeps your form and shows the Installation Agreement Draft card: customer, phone, email, rep, document ref, version — with Approve & Send to Customer, Reject — Needs Fixes, Open PDF in new tab and Delete.
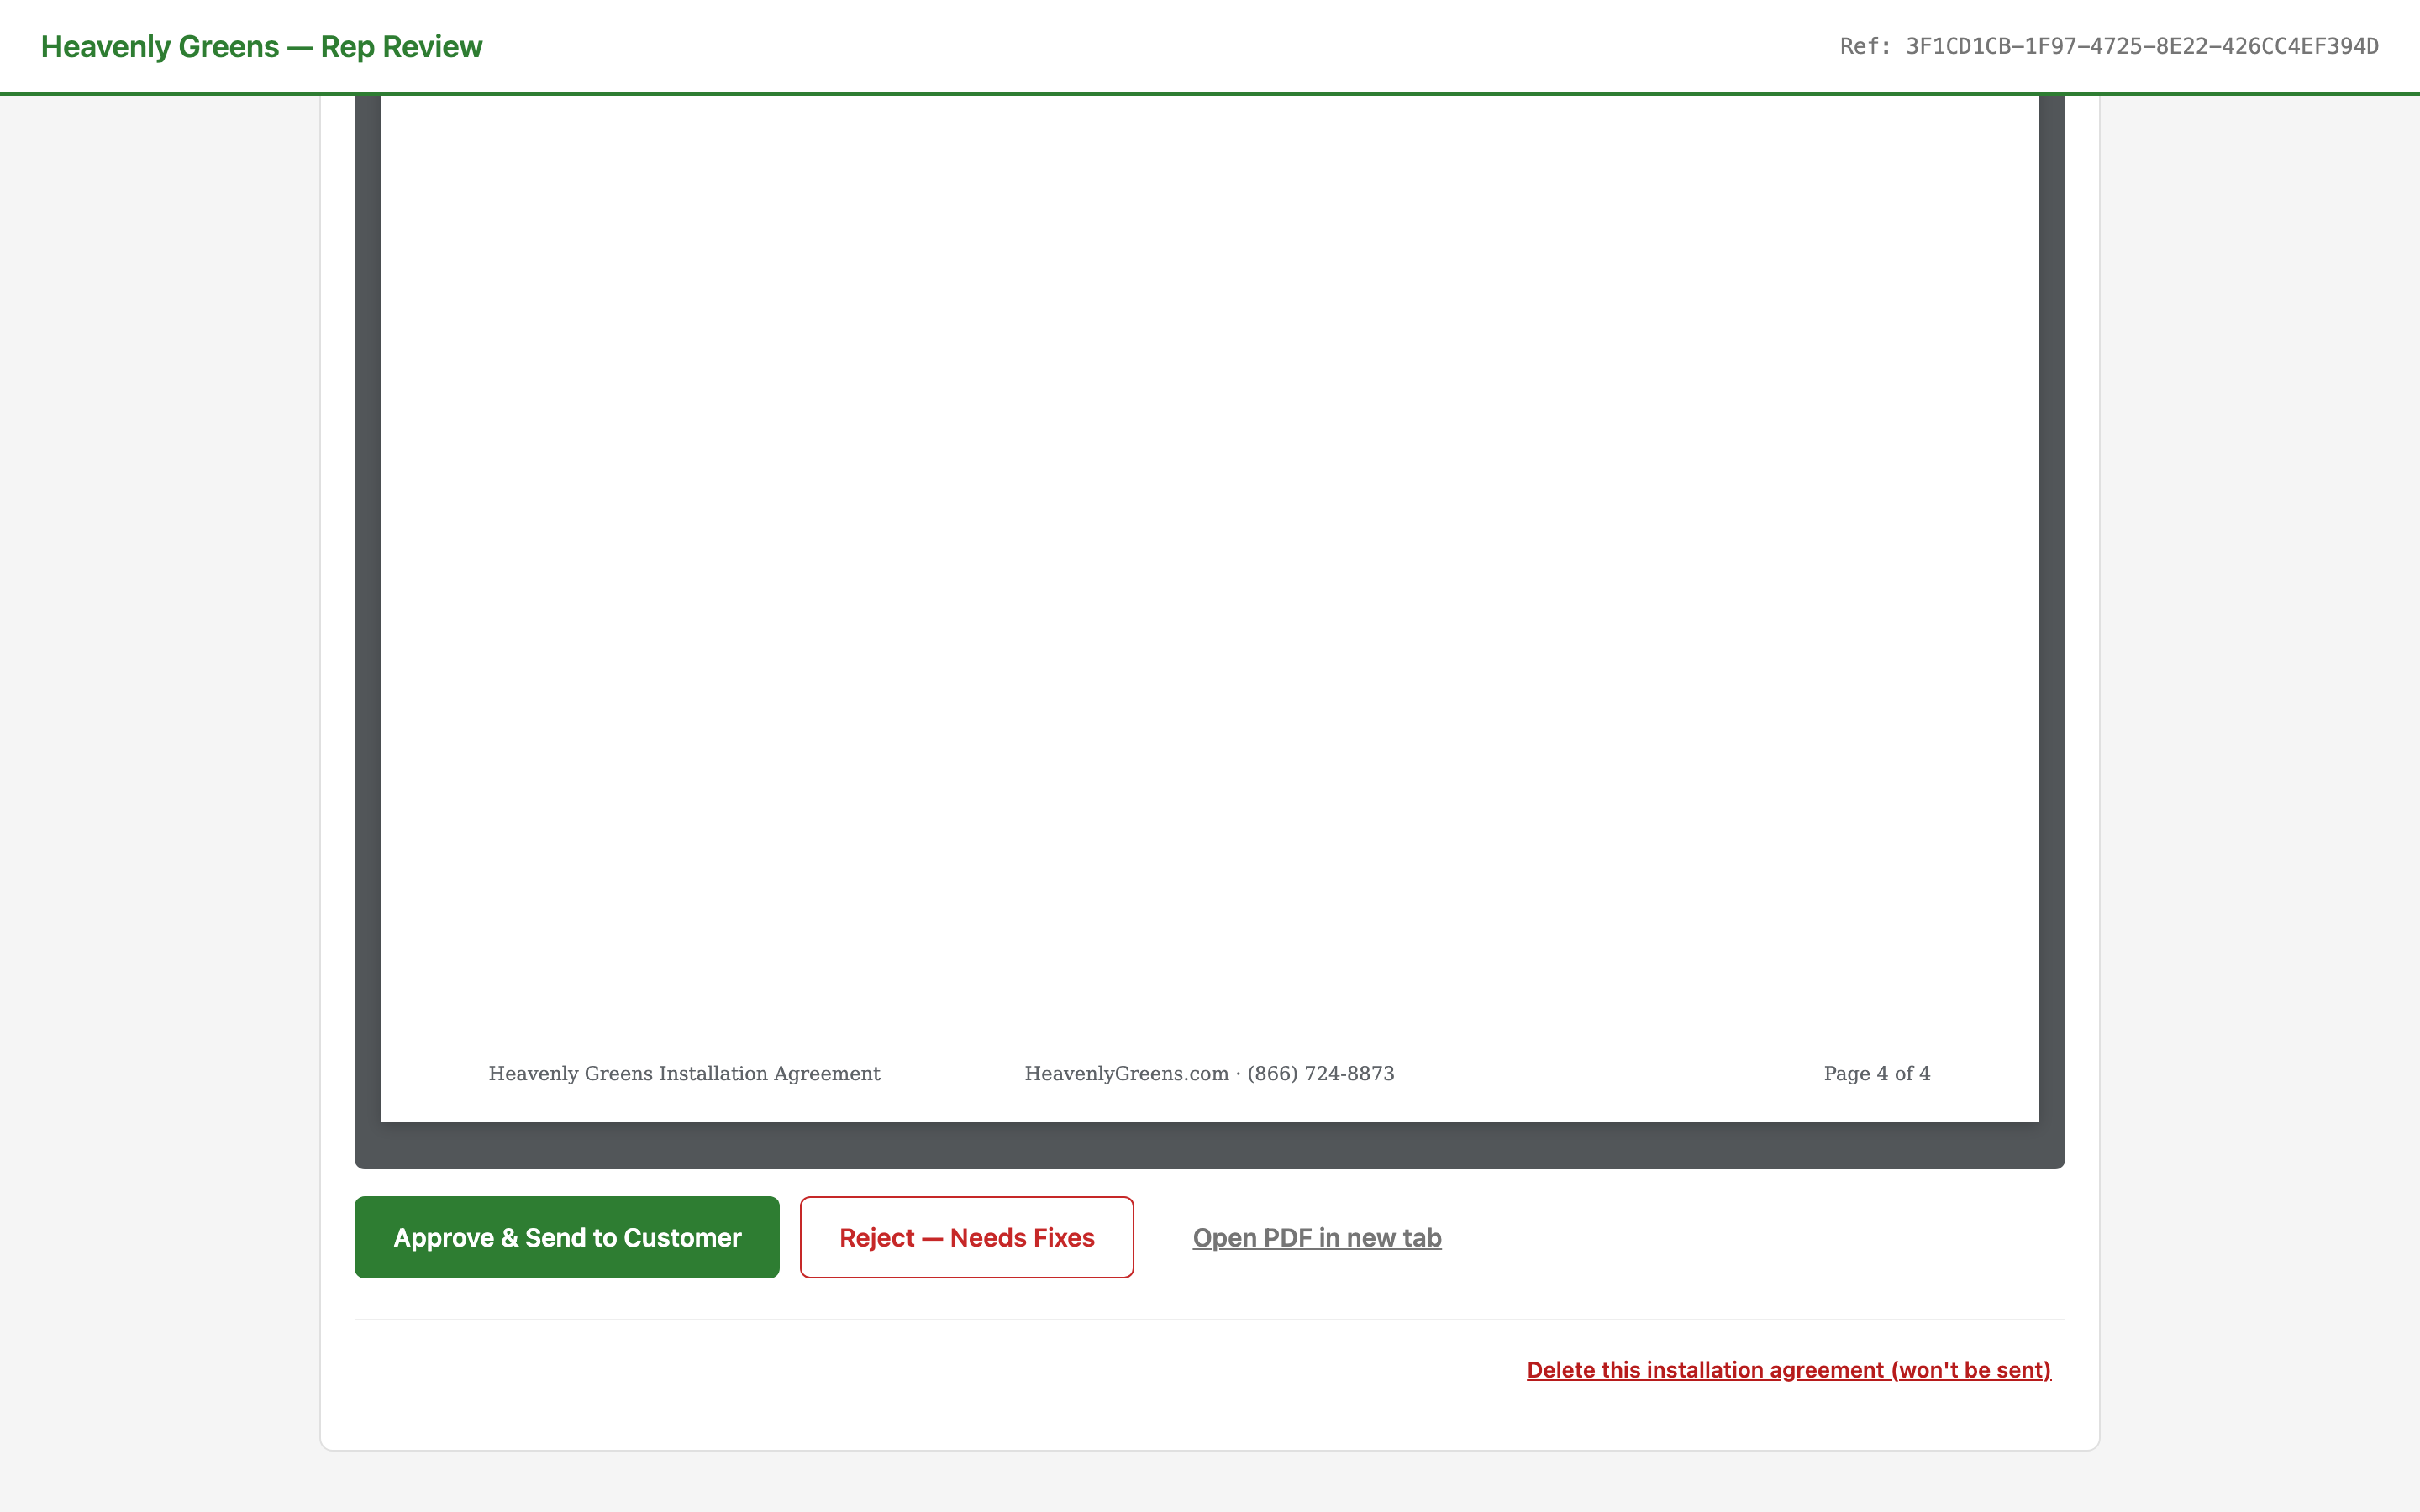
The Installation Agreement Draft card

SALES REPOptional: open the PDF and read the draft

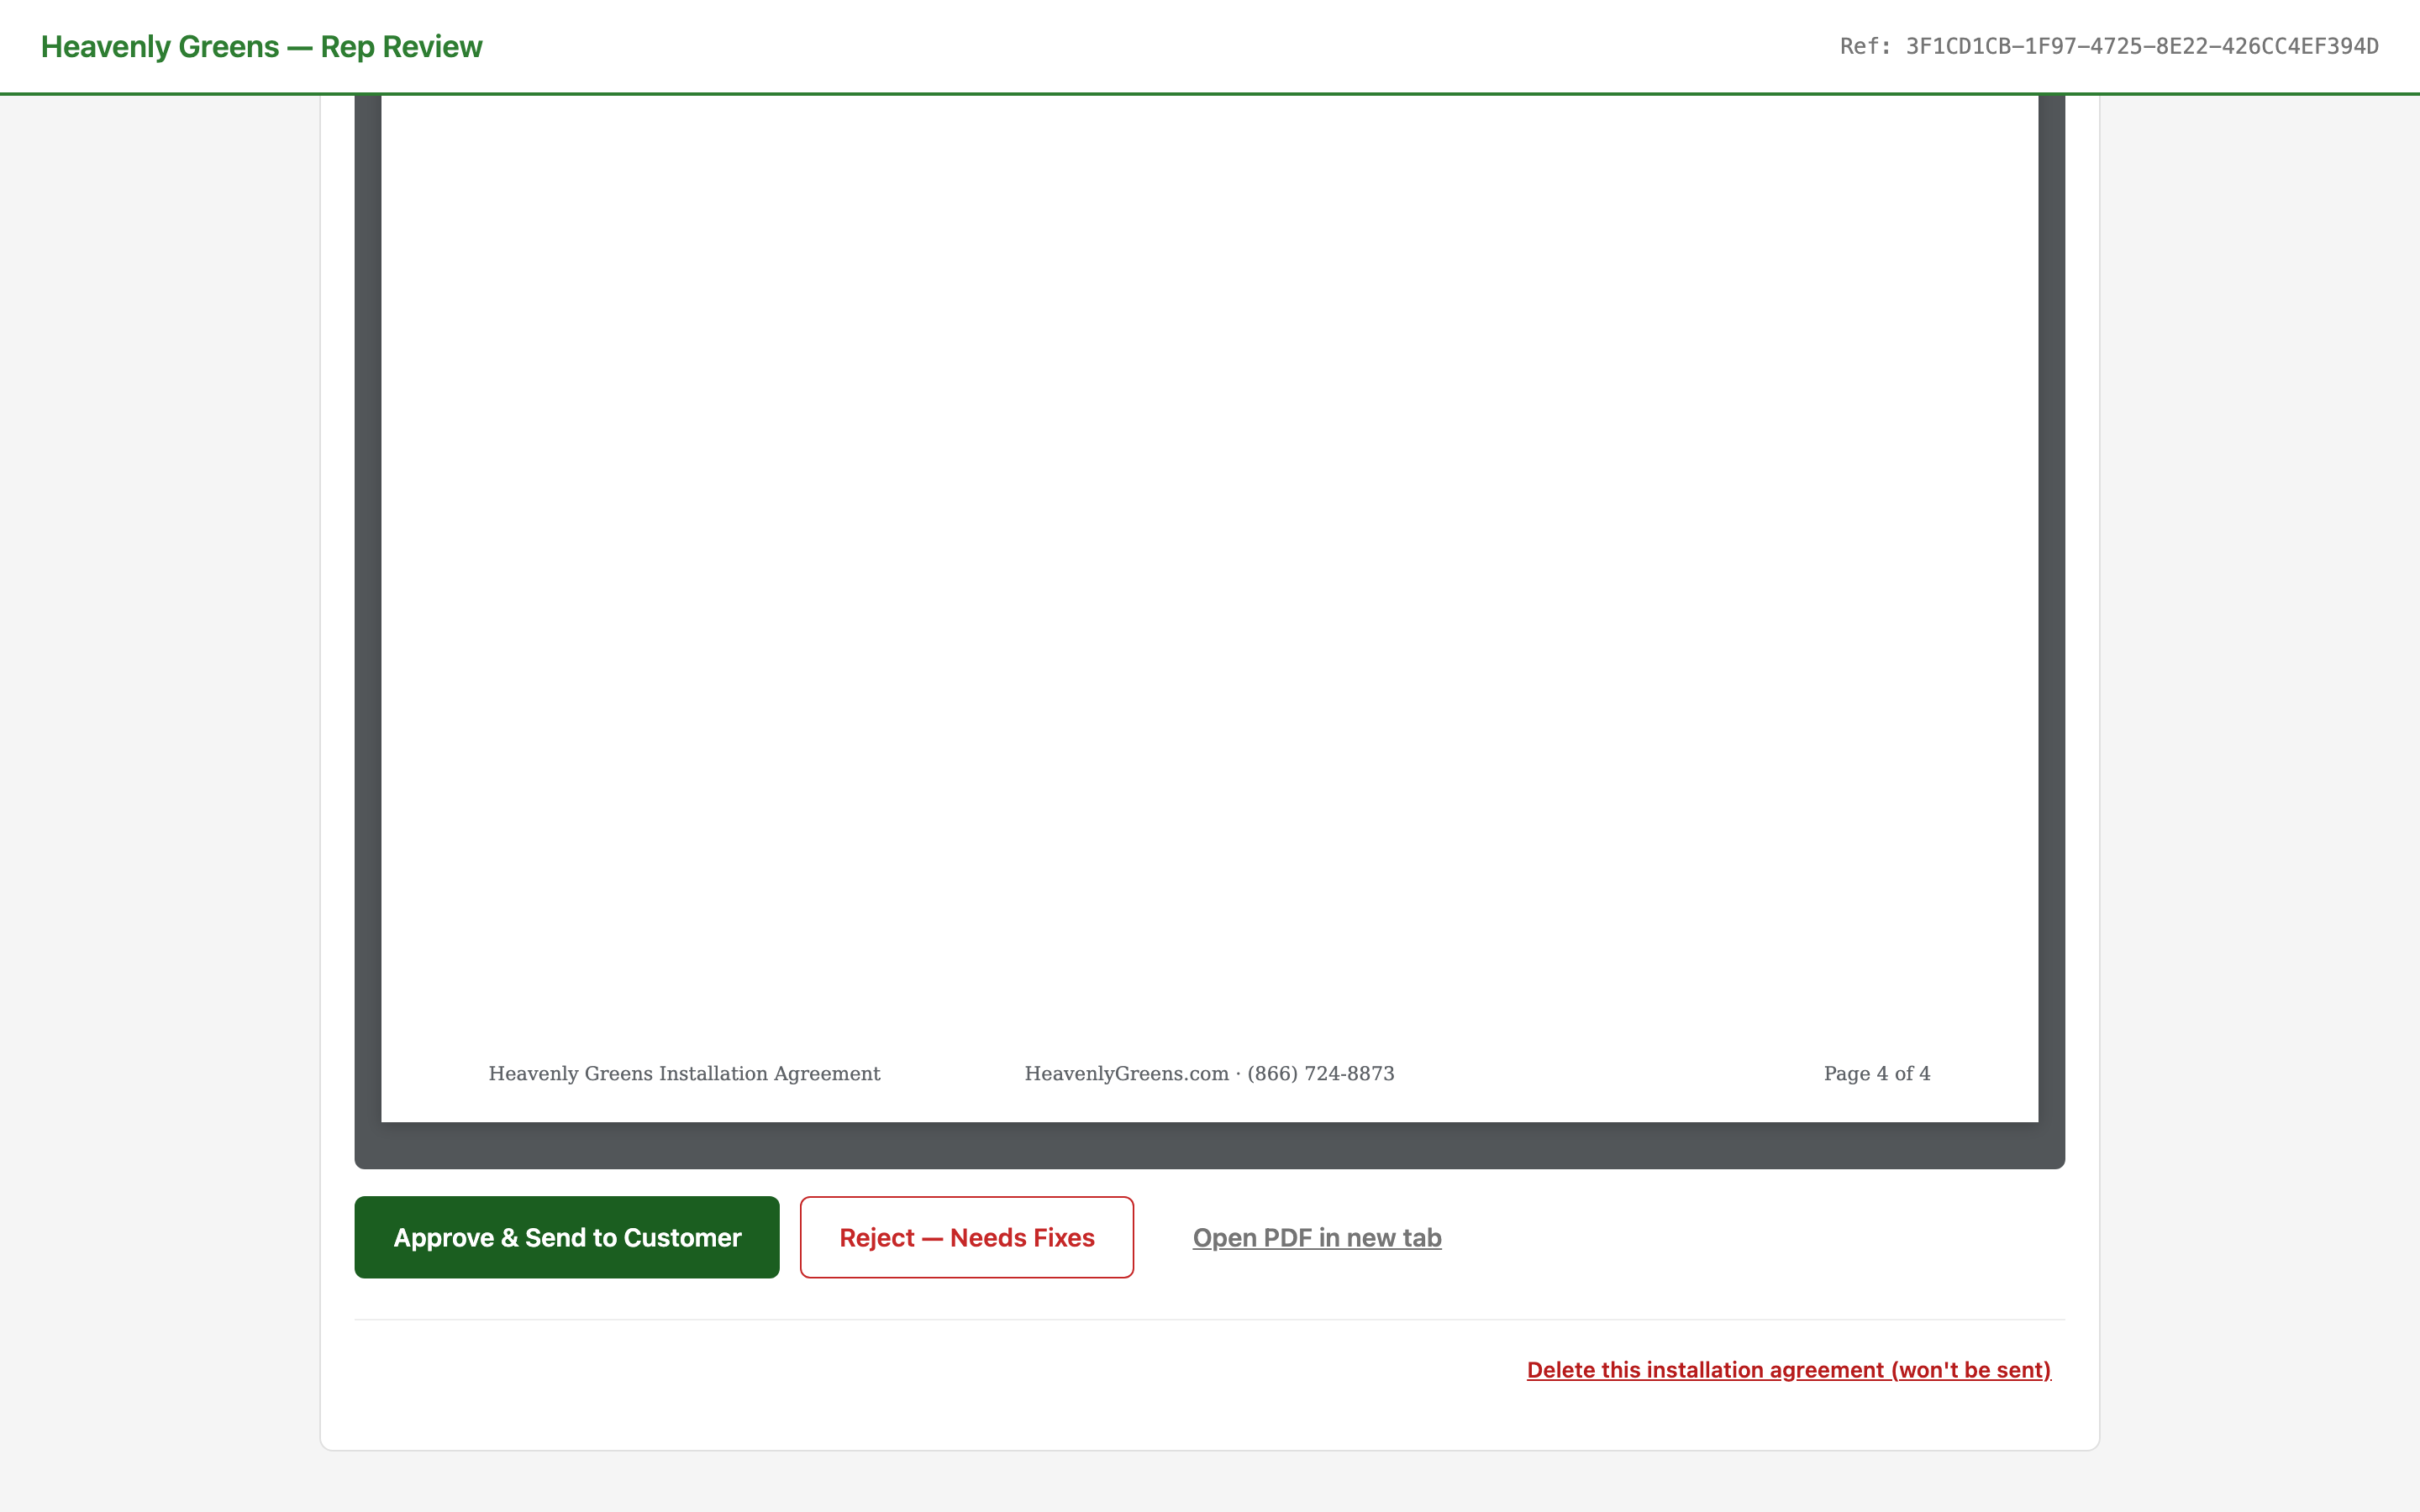
Four pages: agreement, terms, waivers, signature page. Read it the way the customer will.
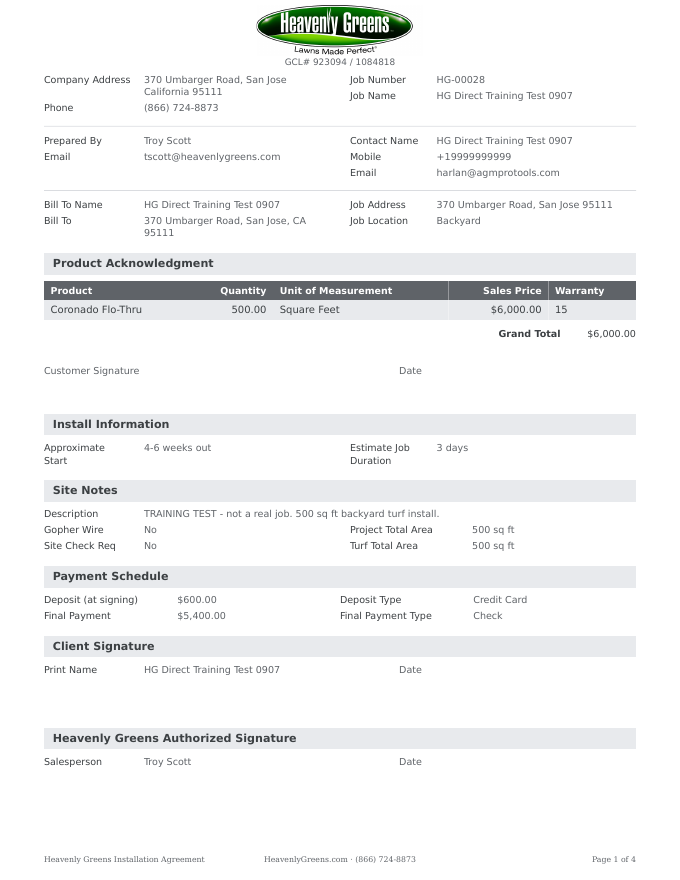
Page 1 of the draft agreement PDF

Chapter 2: Send it for signature

Two presses of Approve & Send. The second one is the send.

SALES REPPress Approve & Send to Customer on the draft card

You land on the Rep Review page, headed with the job number (HG-000xx): Review required. Please verify every field is correct… Once you approve, the customer receives the signing link immediately.

The Rep Review page

SALES REPPress Approve & Send to Customer again, then OK

The browser asks Approve this draft and send the signing link to the customer? — OK is the send. The customer gets the signing link by email (and by text if a mobile is on file); you get the signing copy.

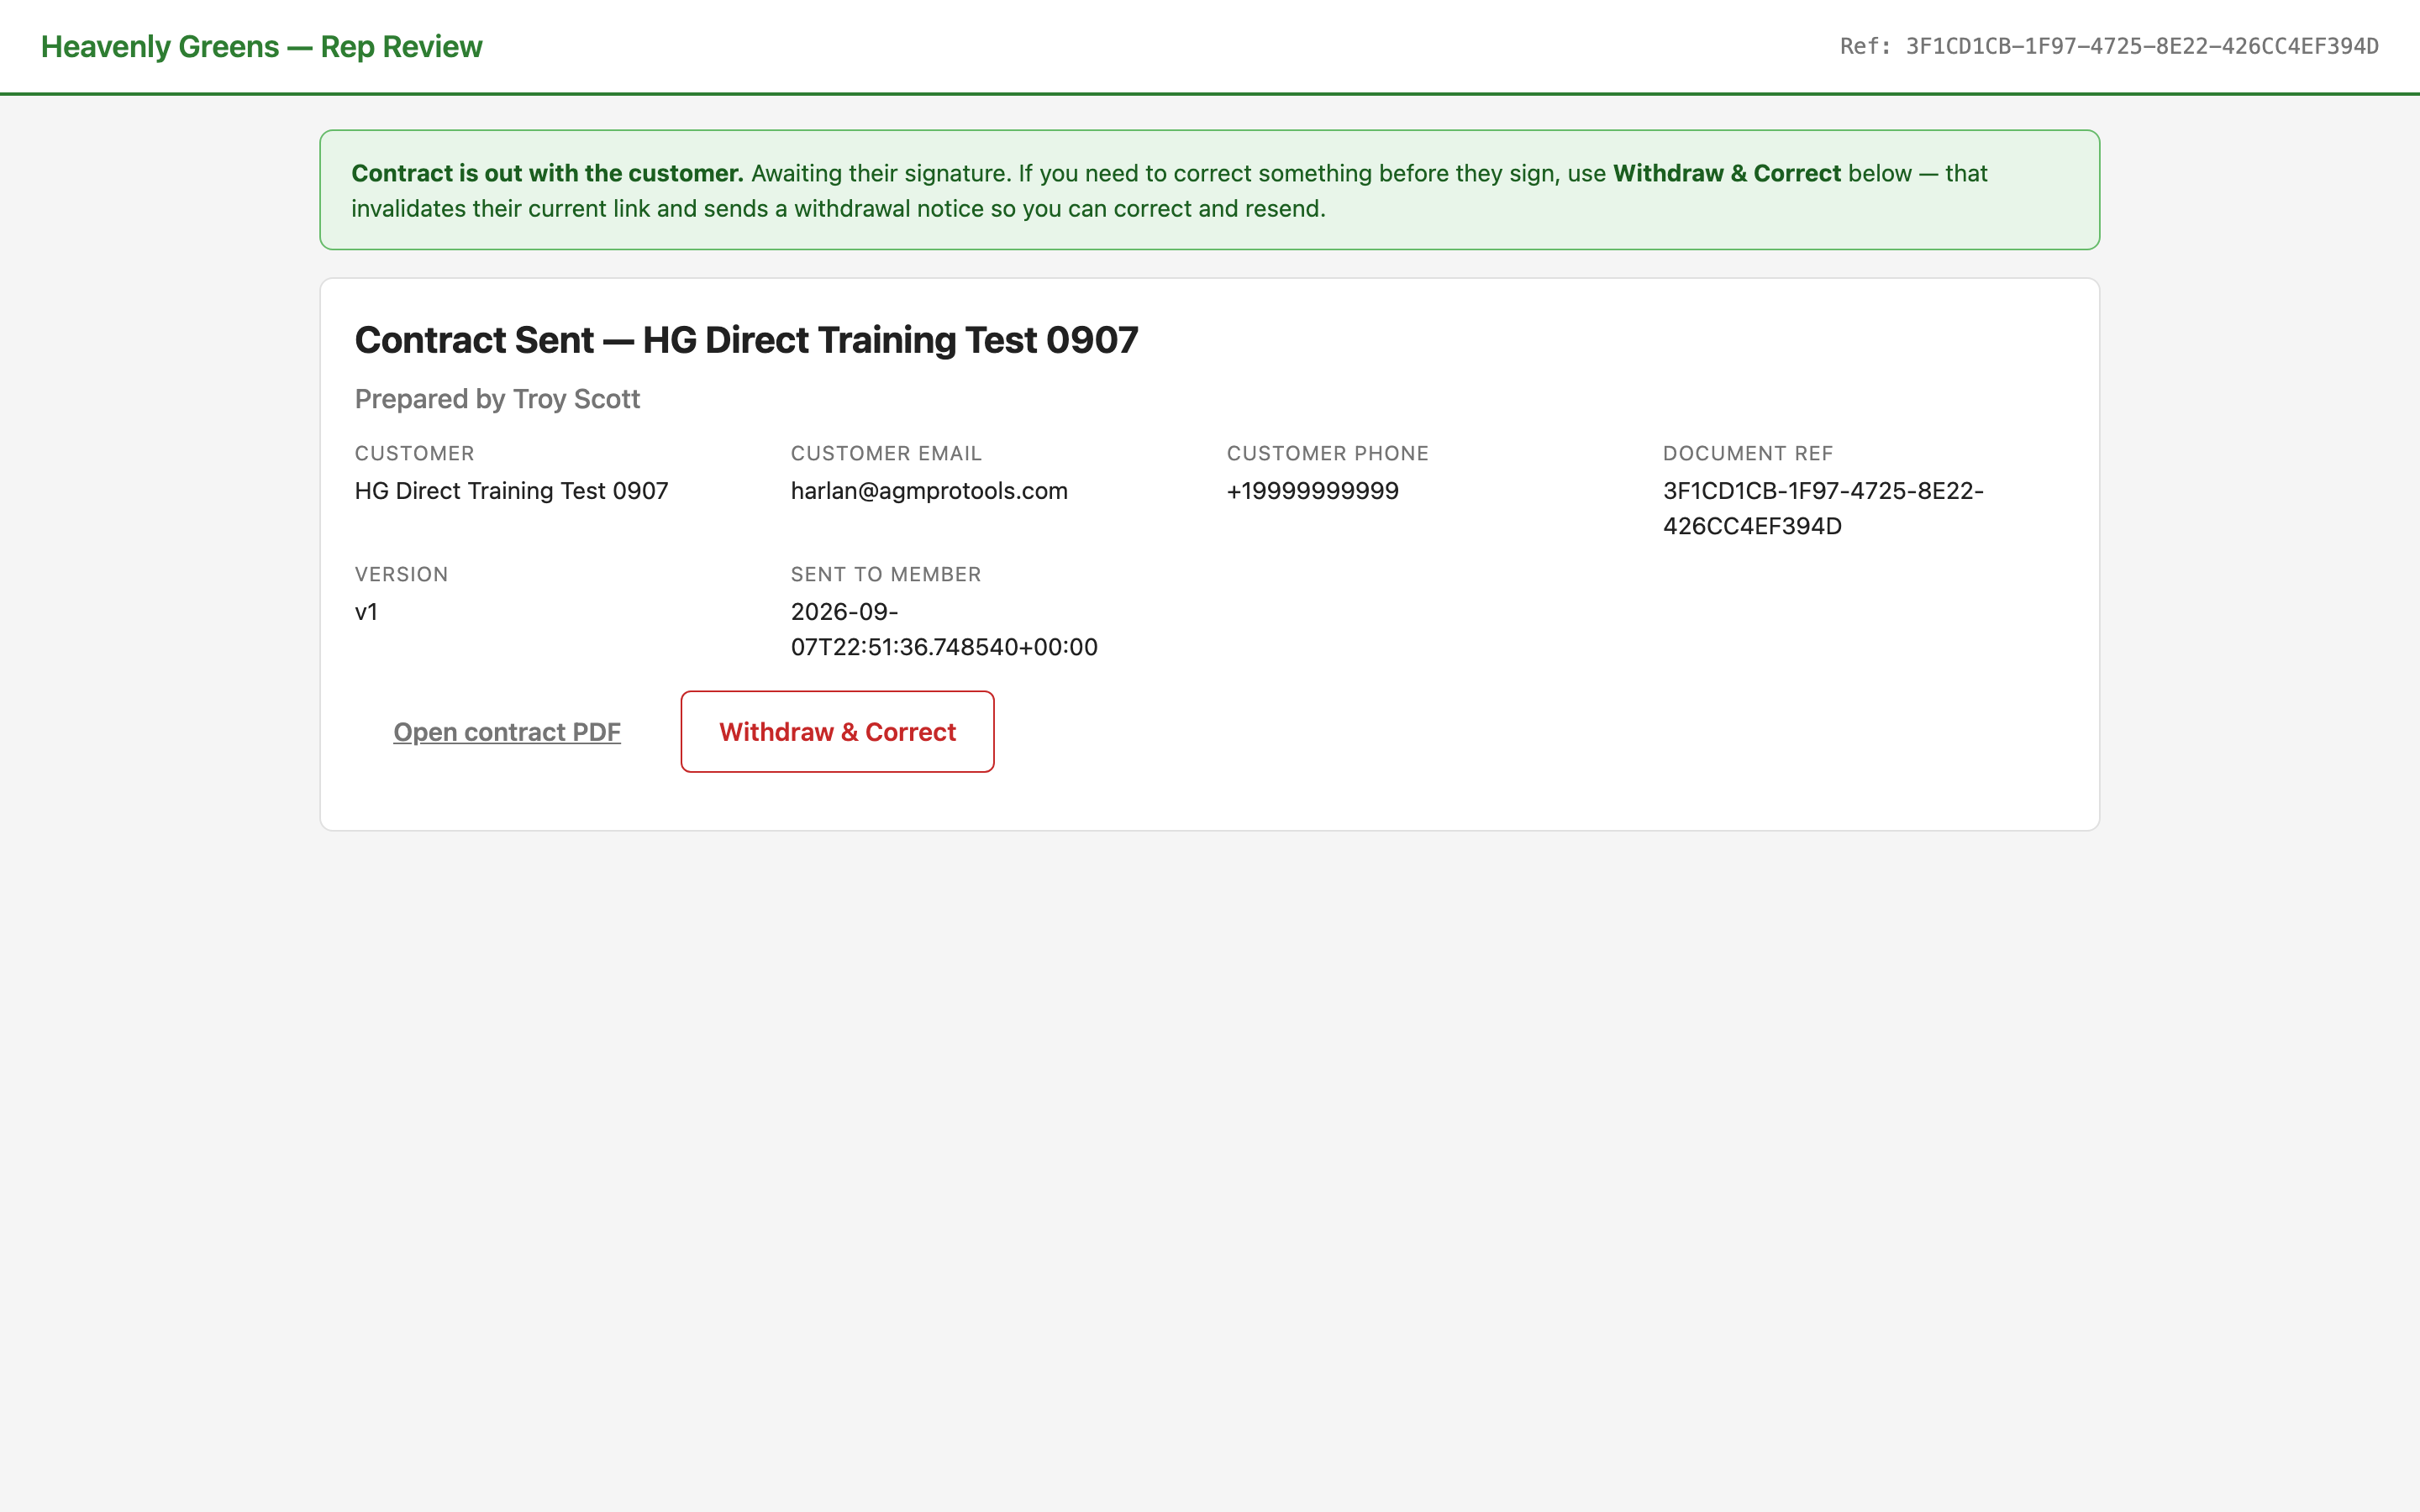
The page flips to Contract Sent — awaiting their signature. If something must change before they sign, press Withdraw & Correct: it invalidates their link, sends a withdrawal notice, and lets you fix and resend.
Contract Sent — awaiting the customer's signature

Chapter 3: What the customer does

What lands in their inbox and what they press. Tell them this before you leave.

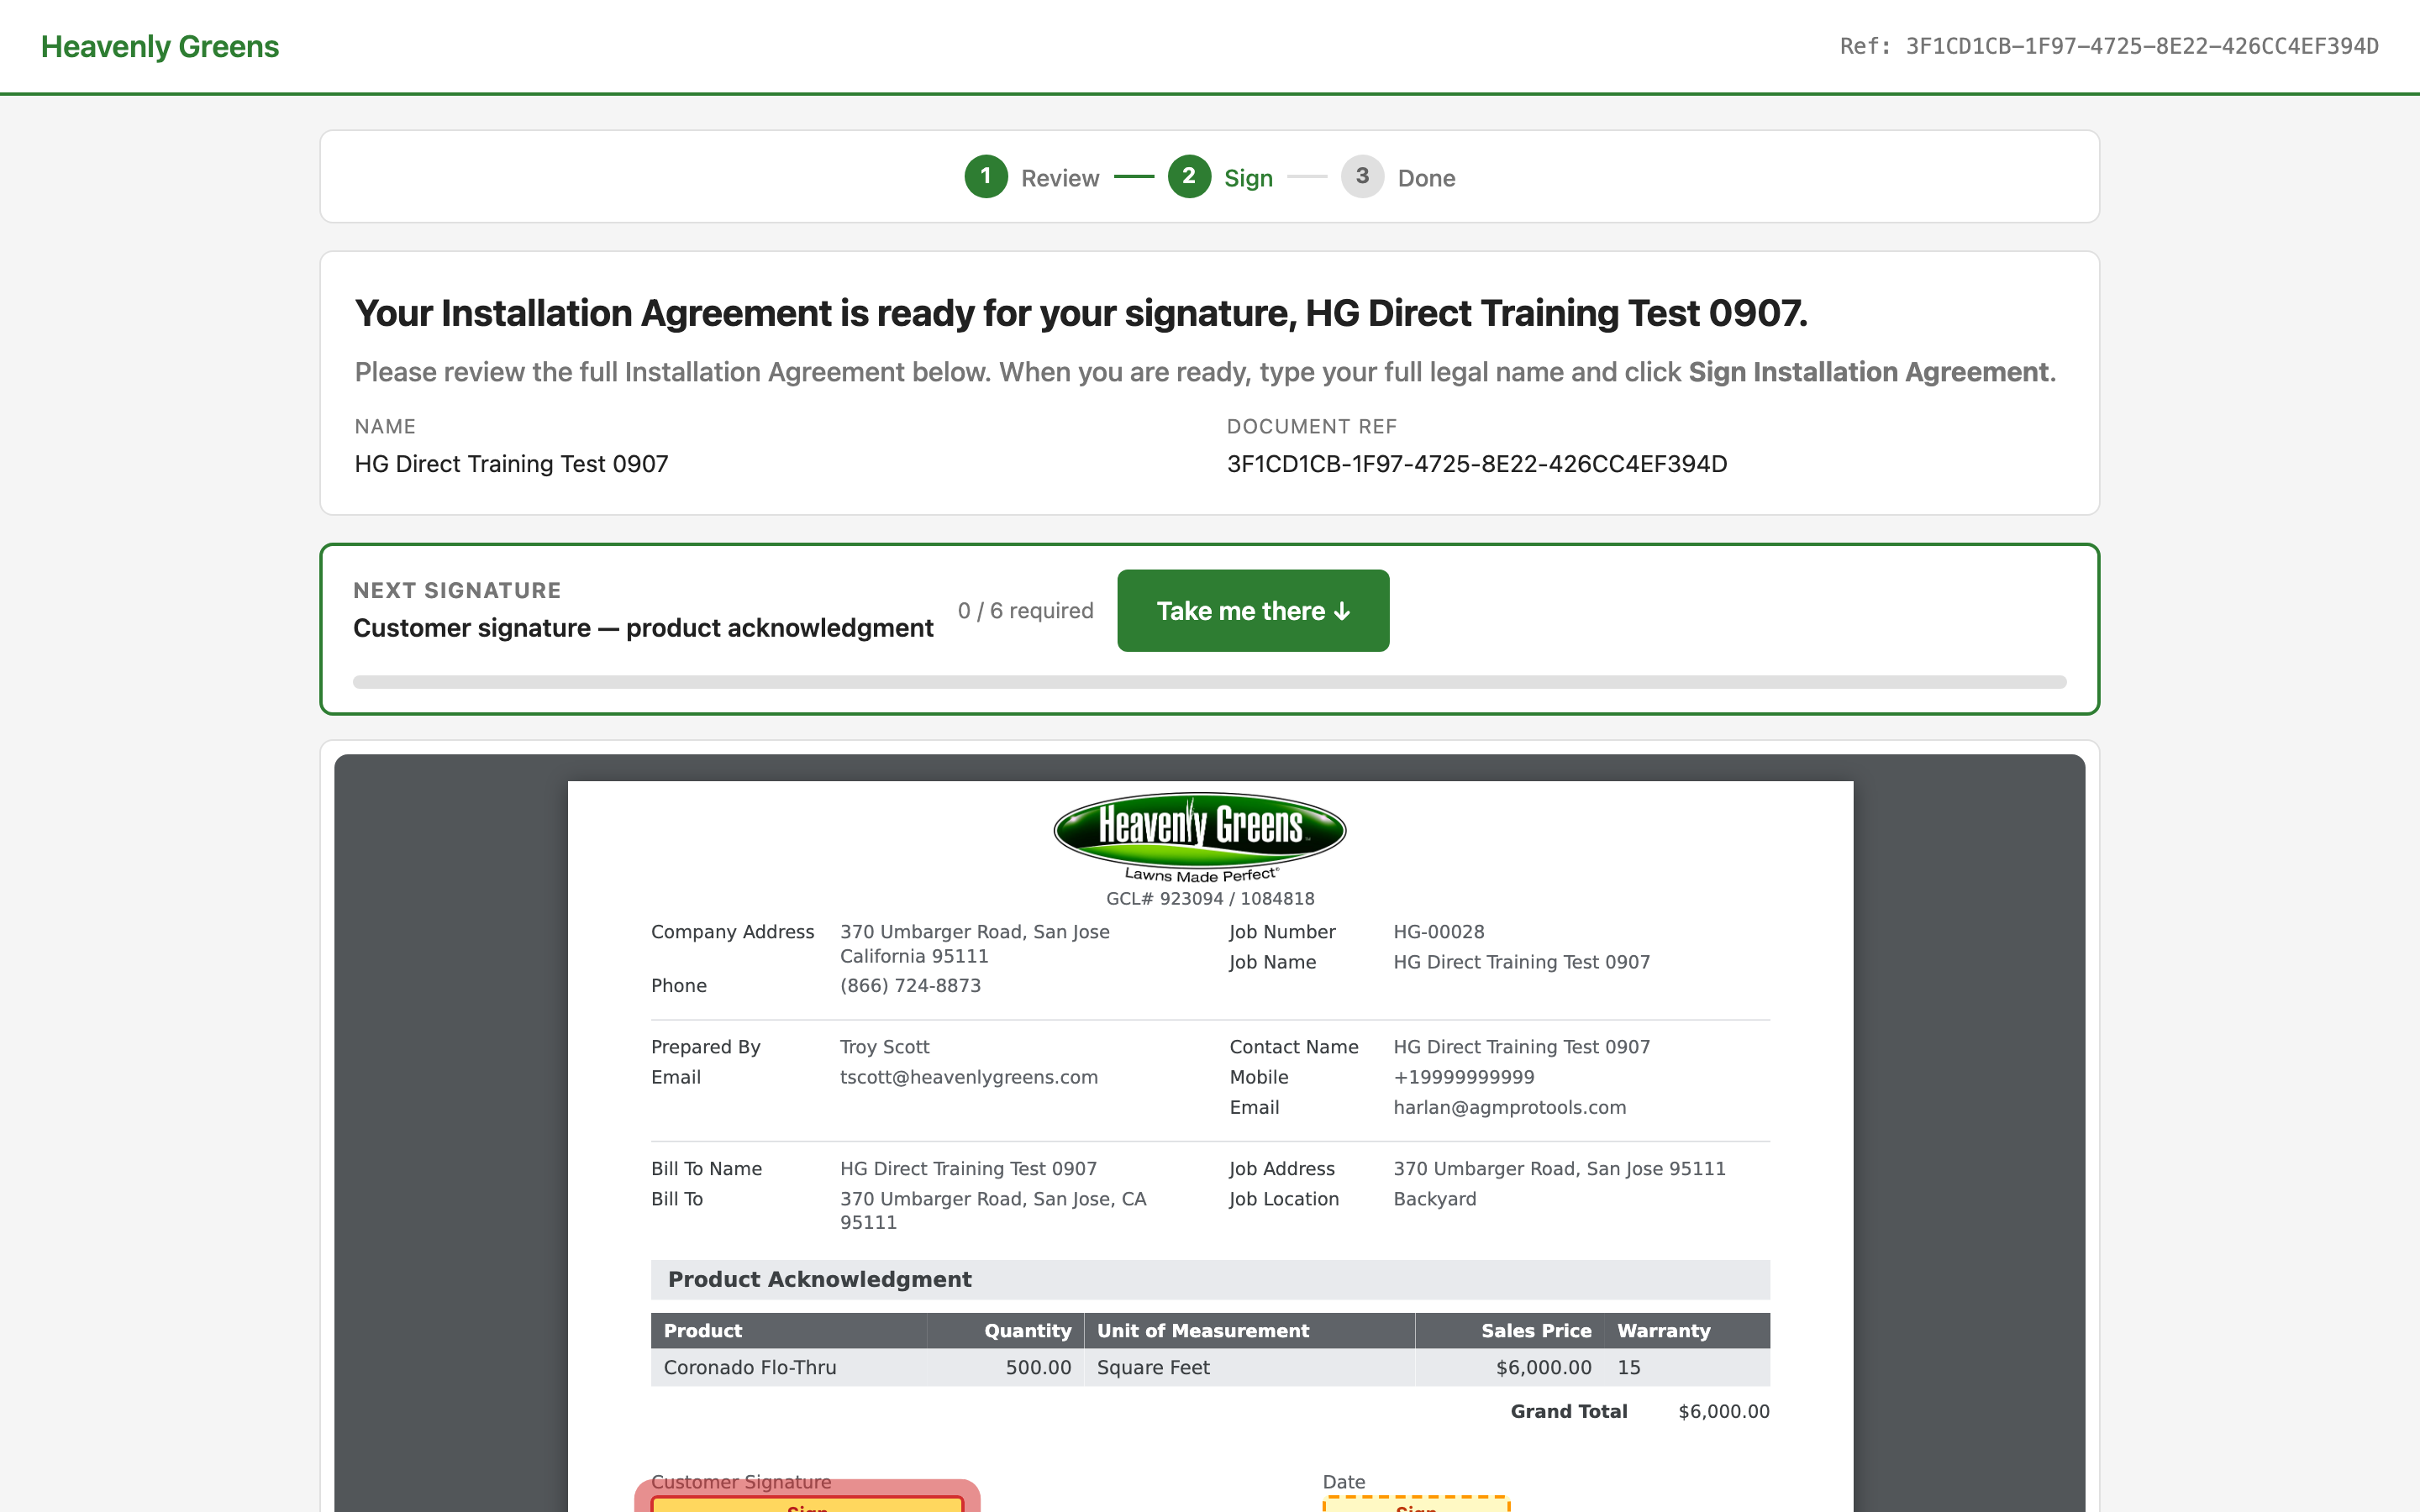
CUSTOMEROpen the signing link → the Sign page

Steps 1 Review · 2 Sign · 3 Done. A NEXT SIGNATURE box counts the required spots (0 / 6) with Take me there ↓.

The customer's Sign page

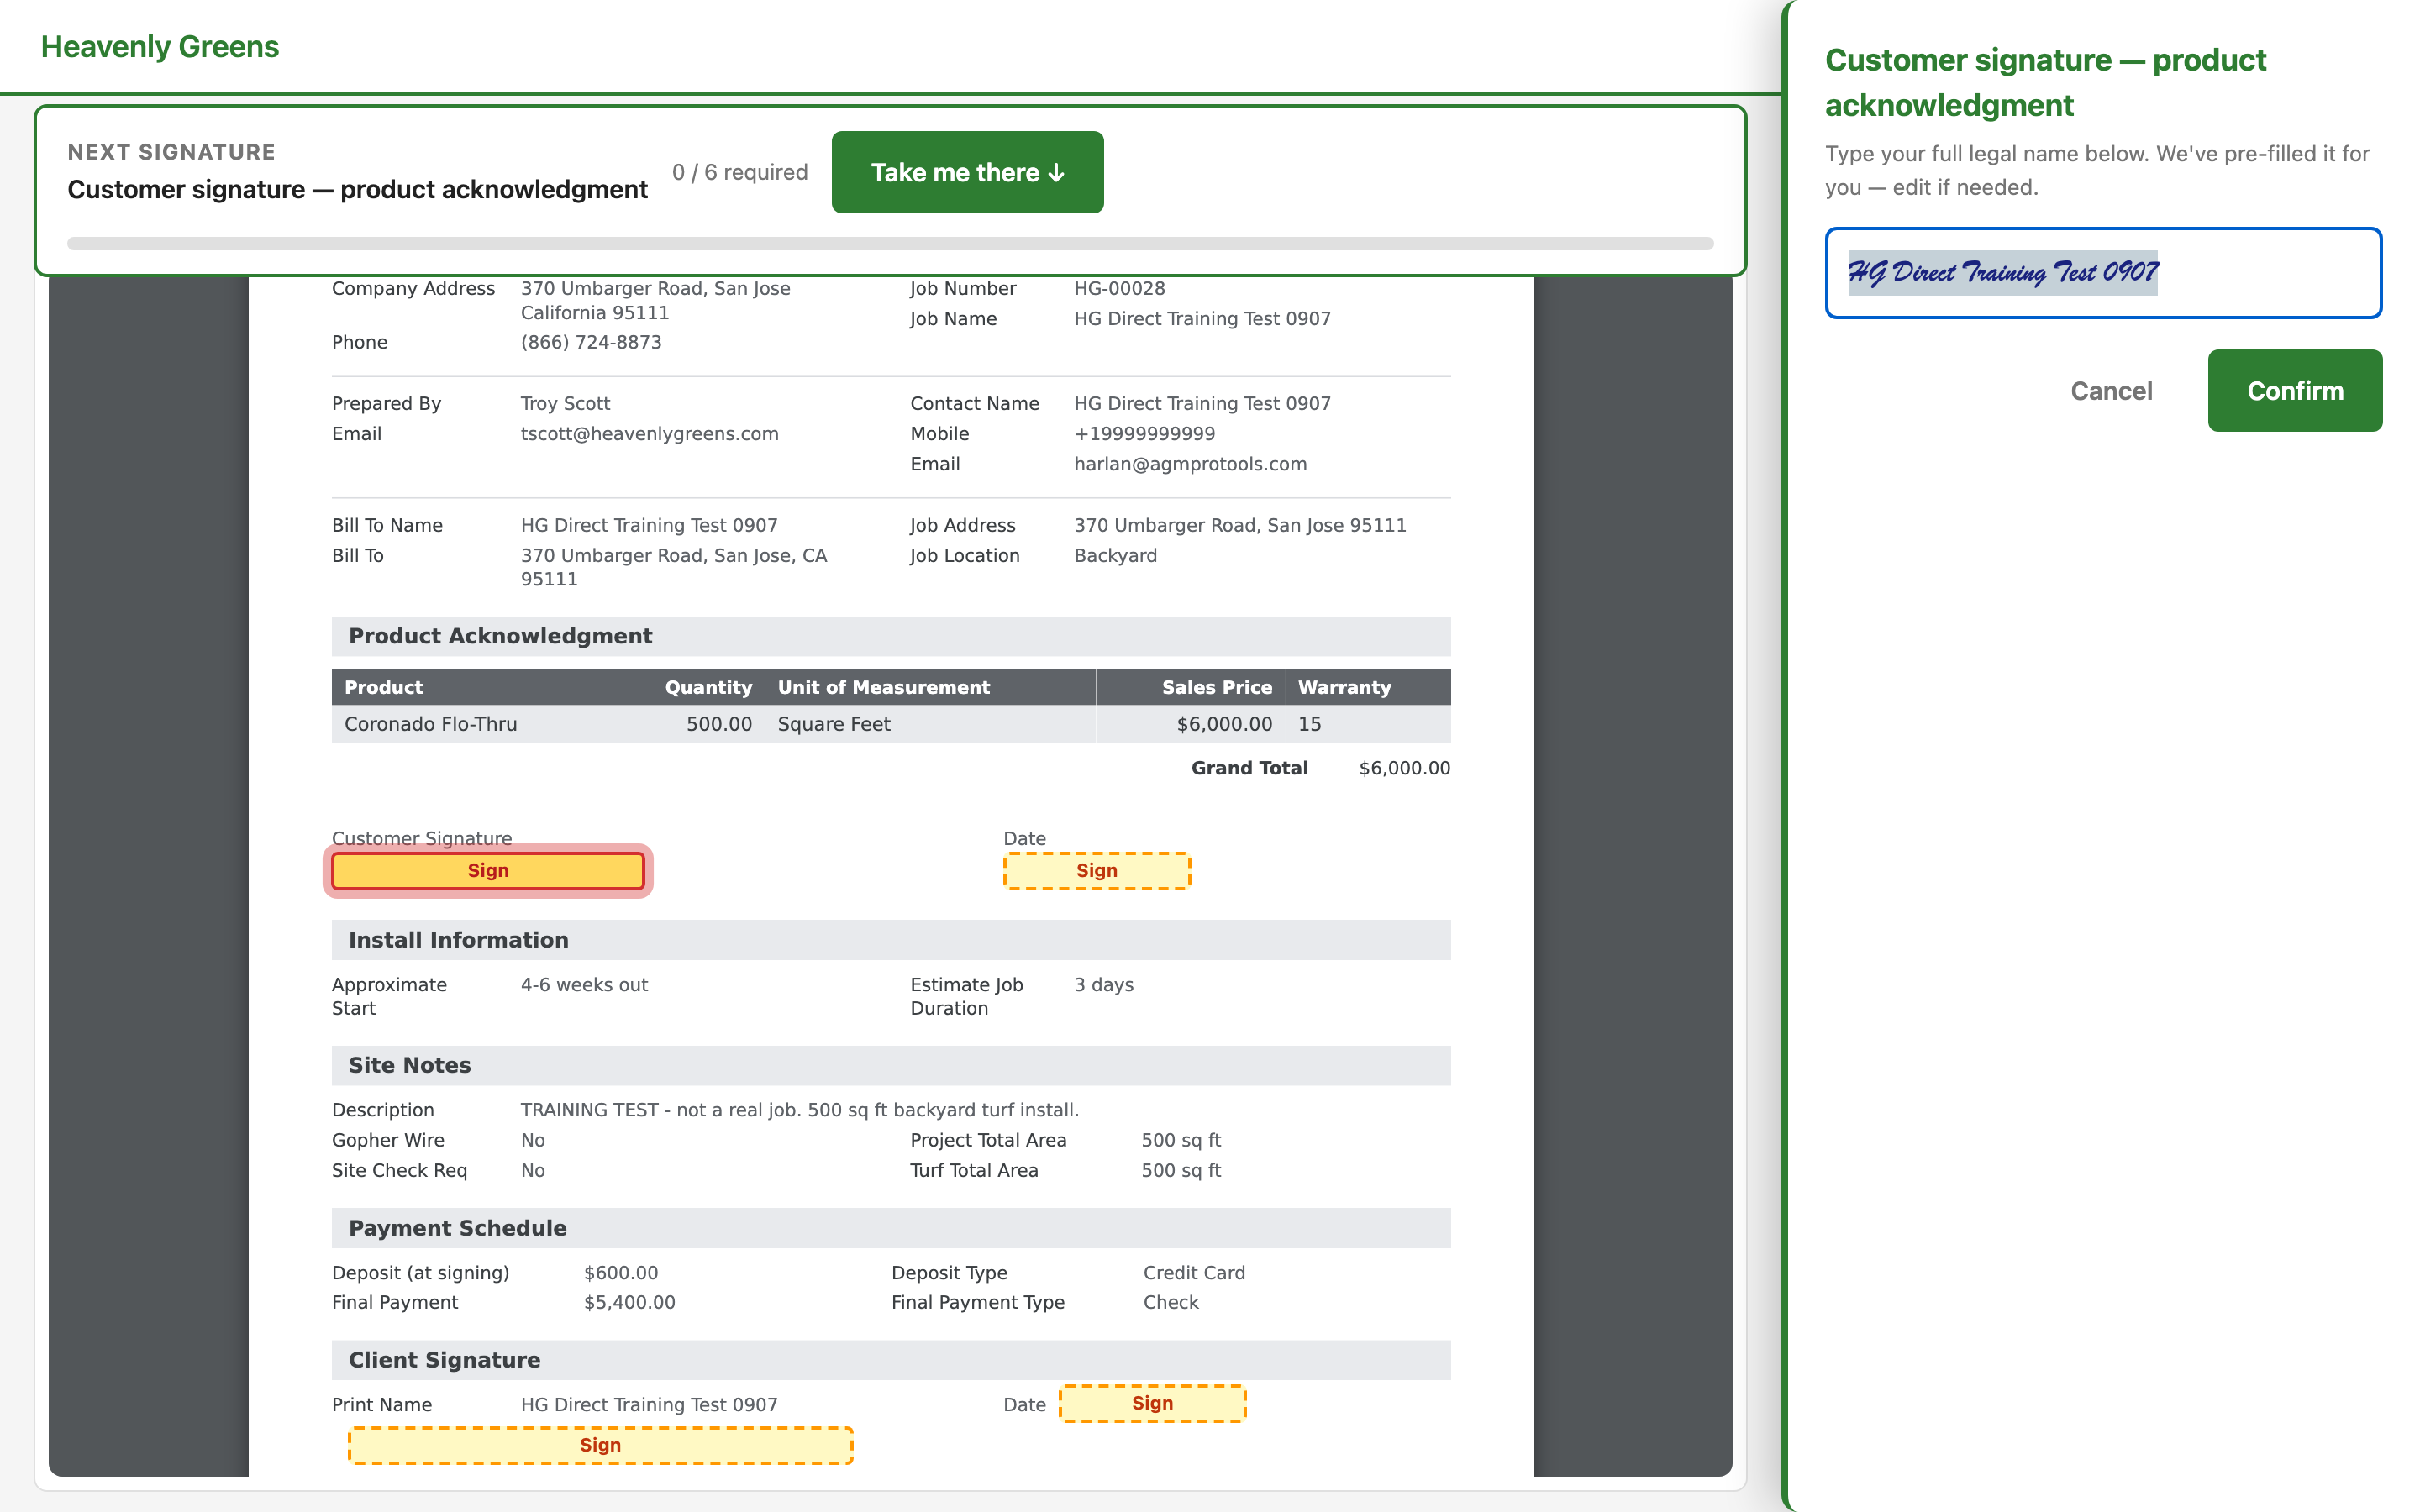
CUSTOMERPress Take me there and Confirm each spot

A small box opens at each signature spot with their name pre-filled — Confirm, then on to the next (product acknowledgment, waivers, terms…).

The first signature spot

CUSTOMERWhen every spot is confirmed: Sign Installation Agreement

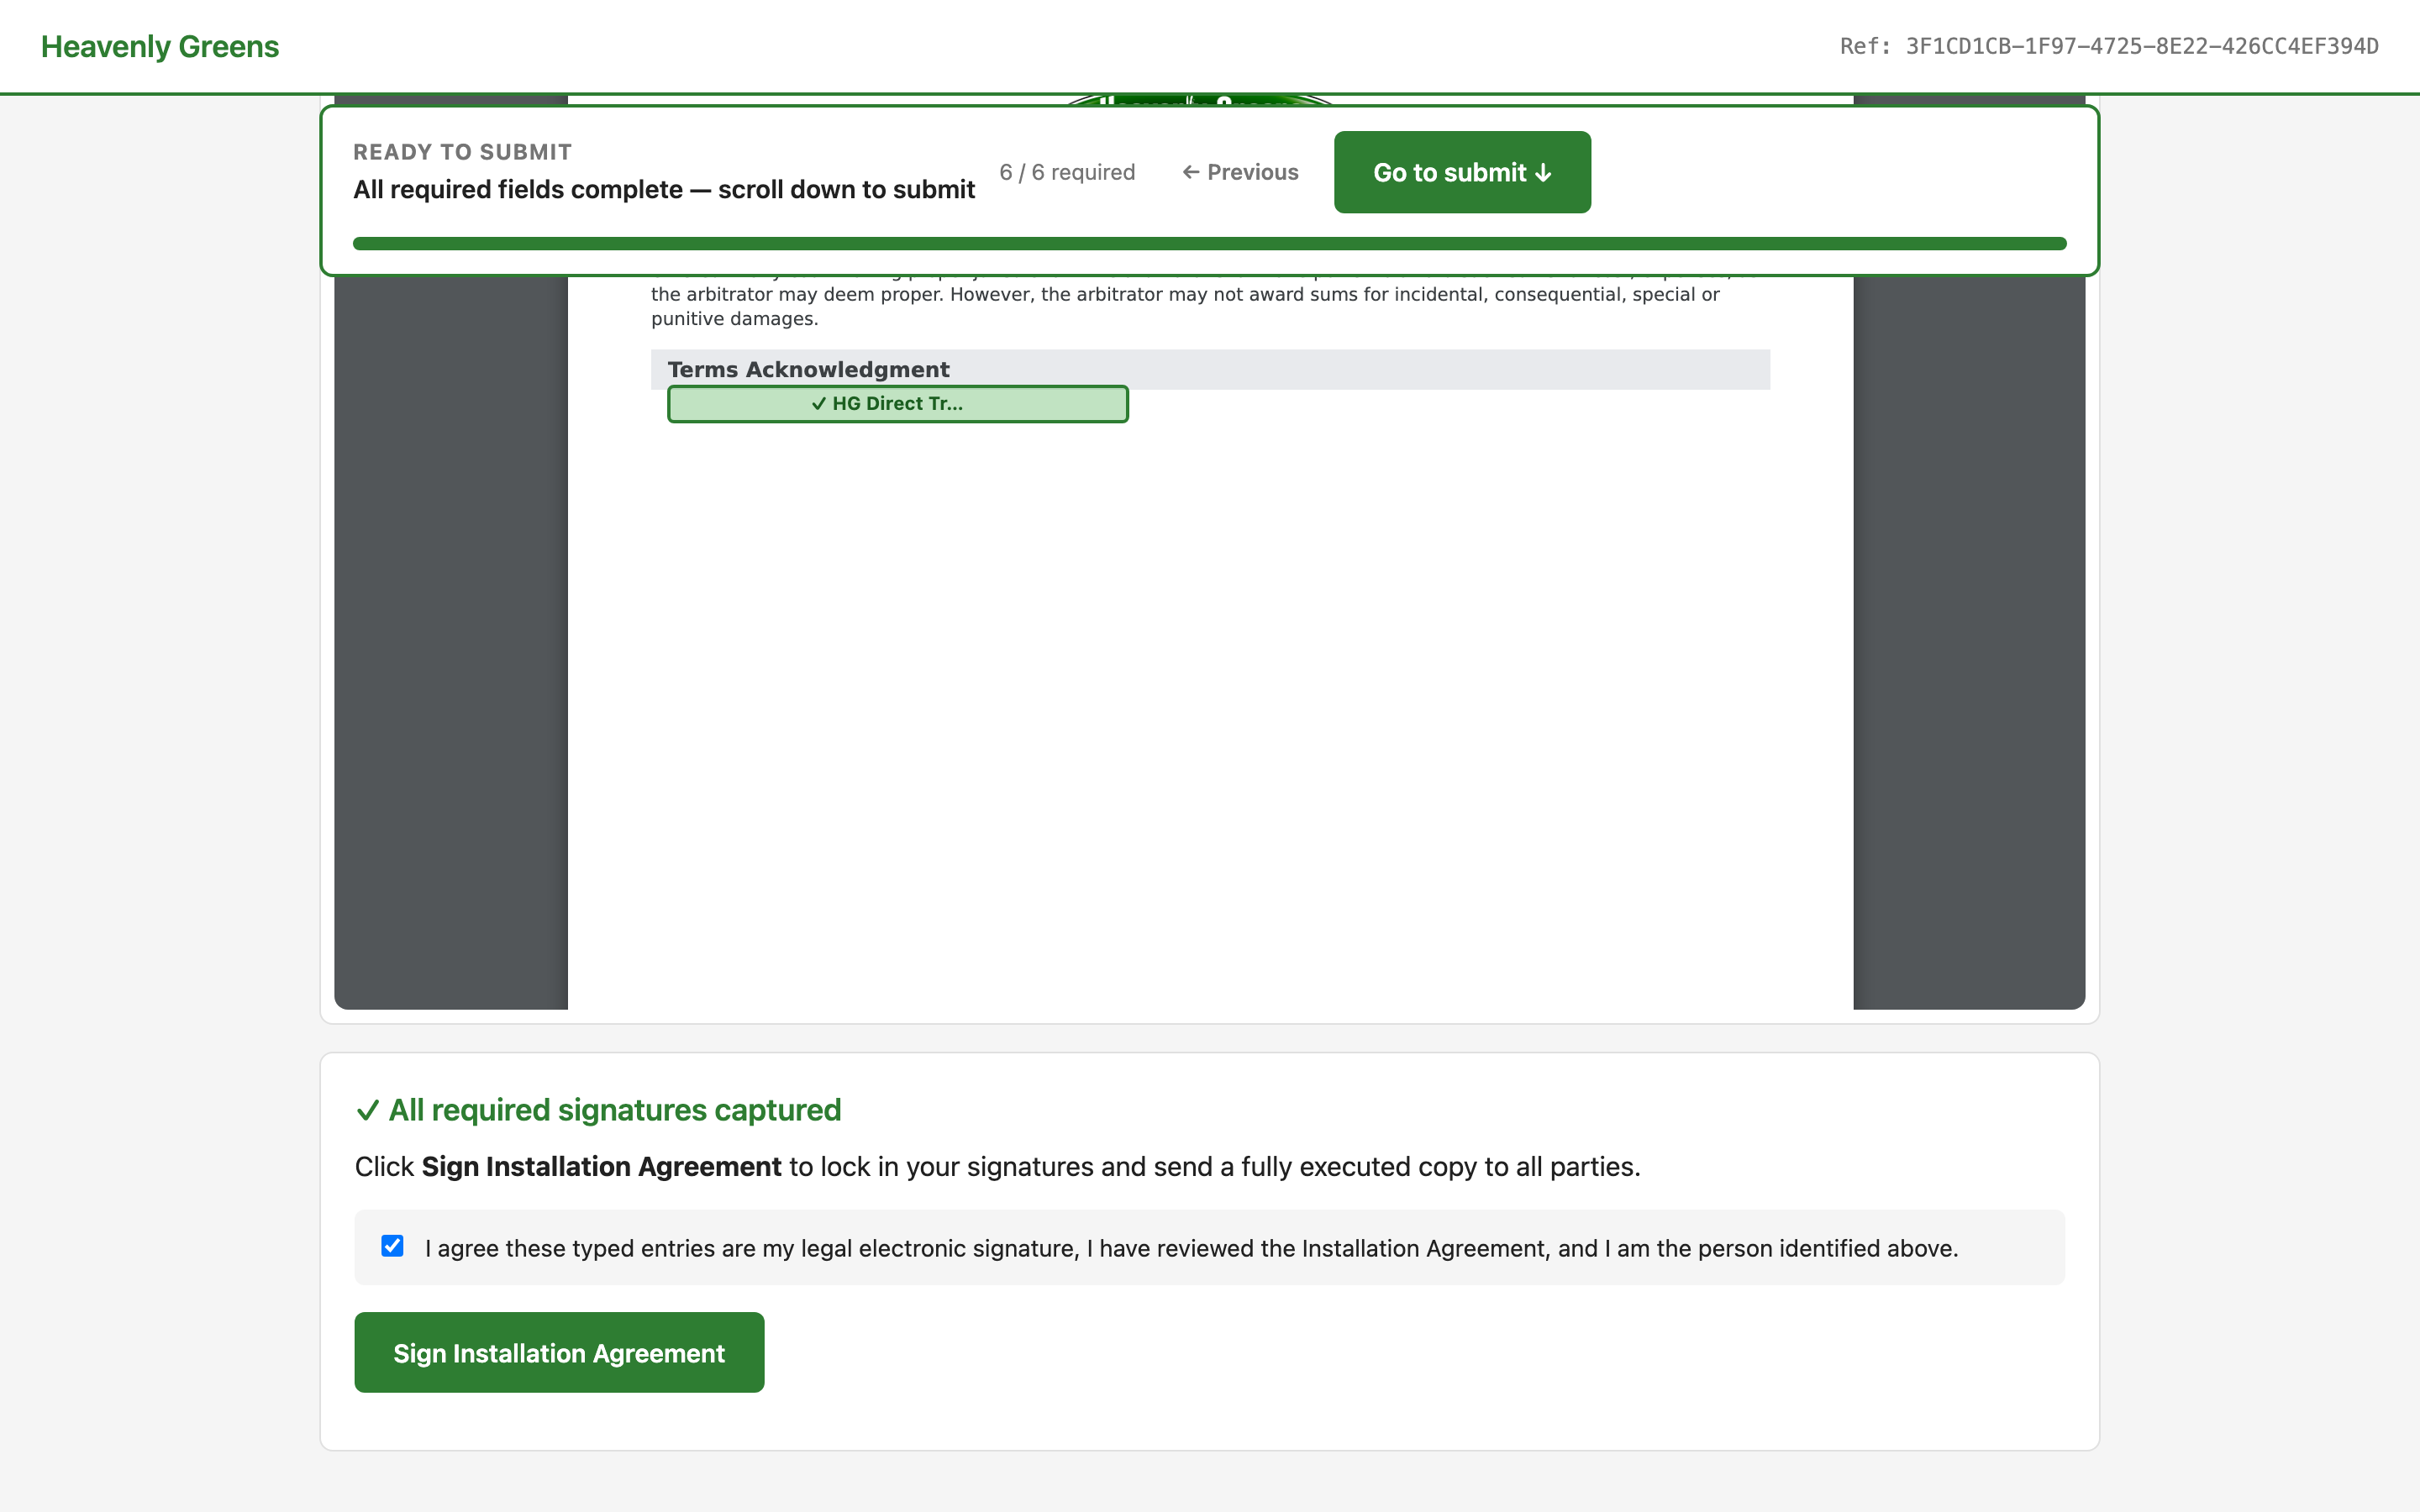
The box reads READY TO SUBMIT. They tick I agree these typed entries are my legal electronic signature (the button stays grey until they do), then press Sign Installation Agreement.

Agreement box ticked, Sign button enabled

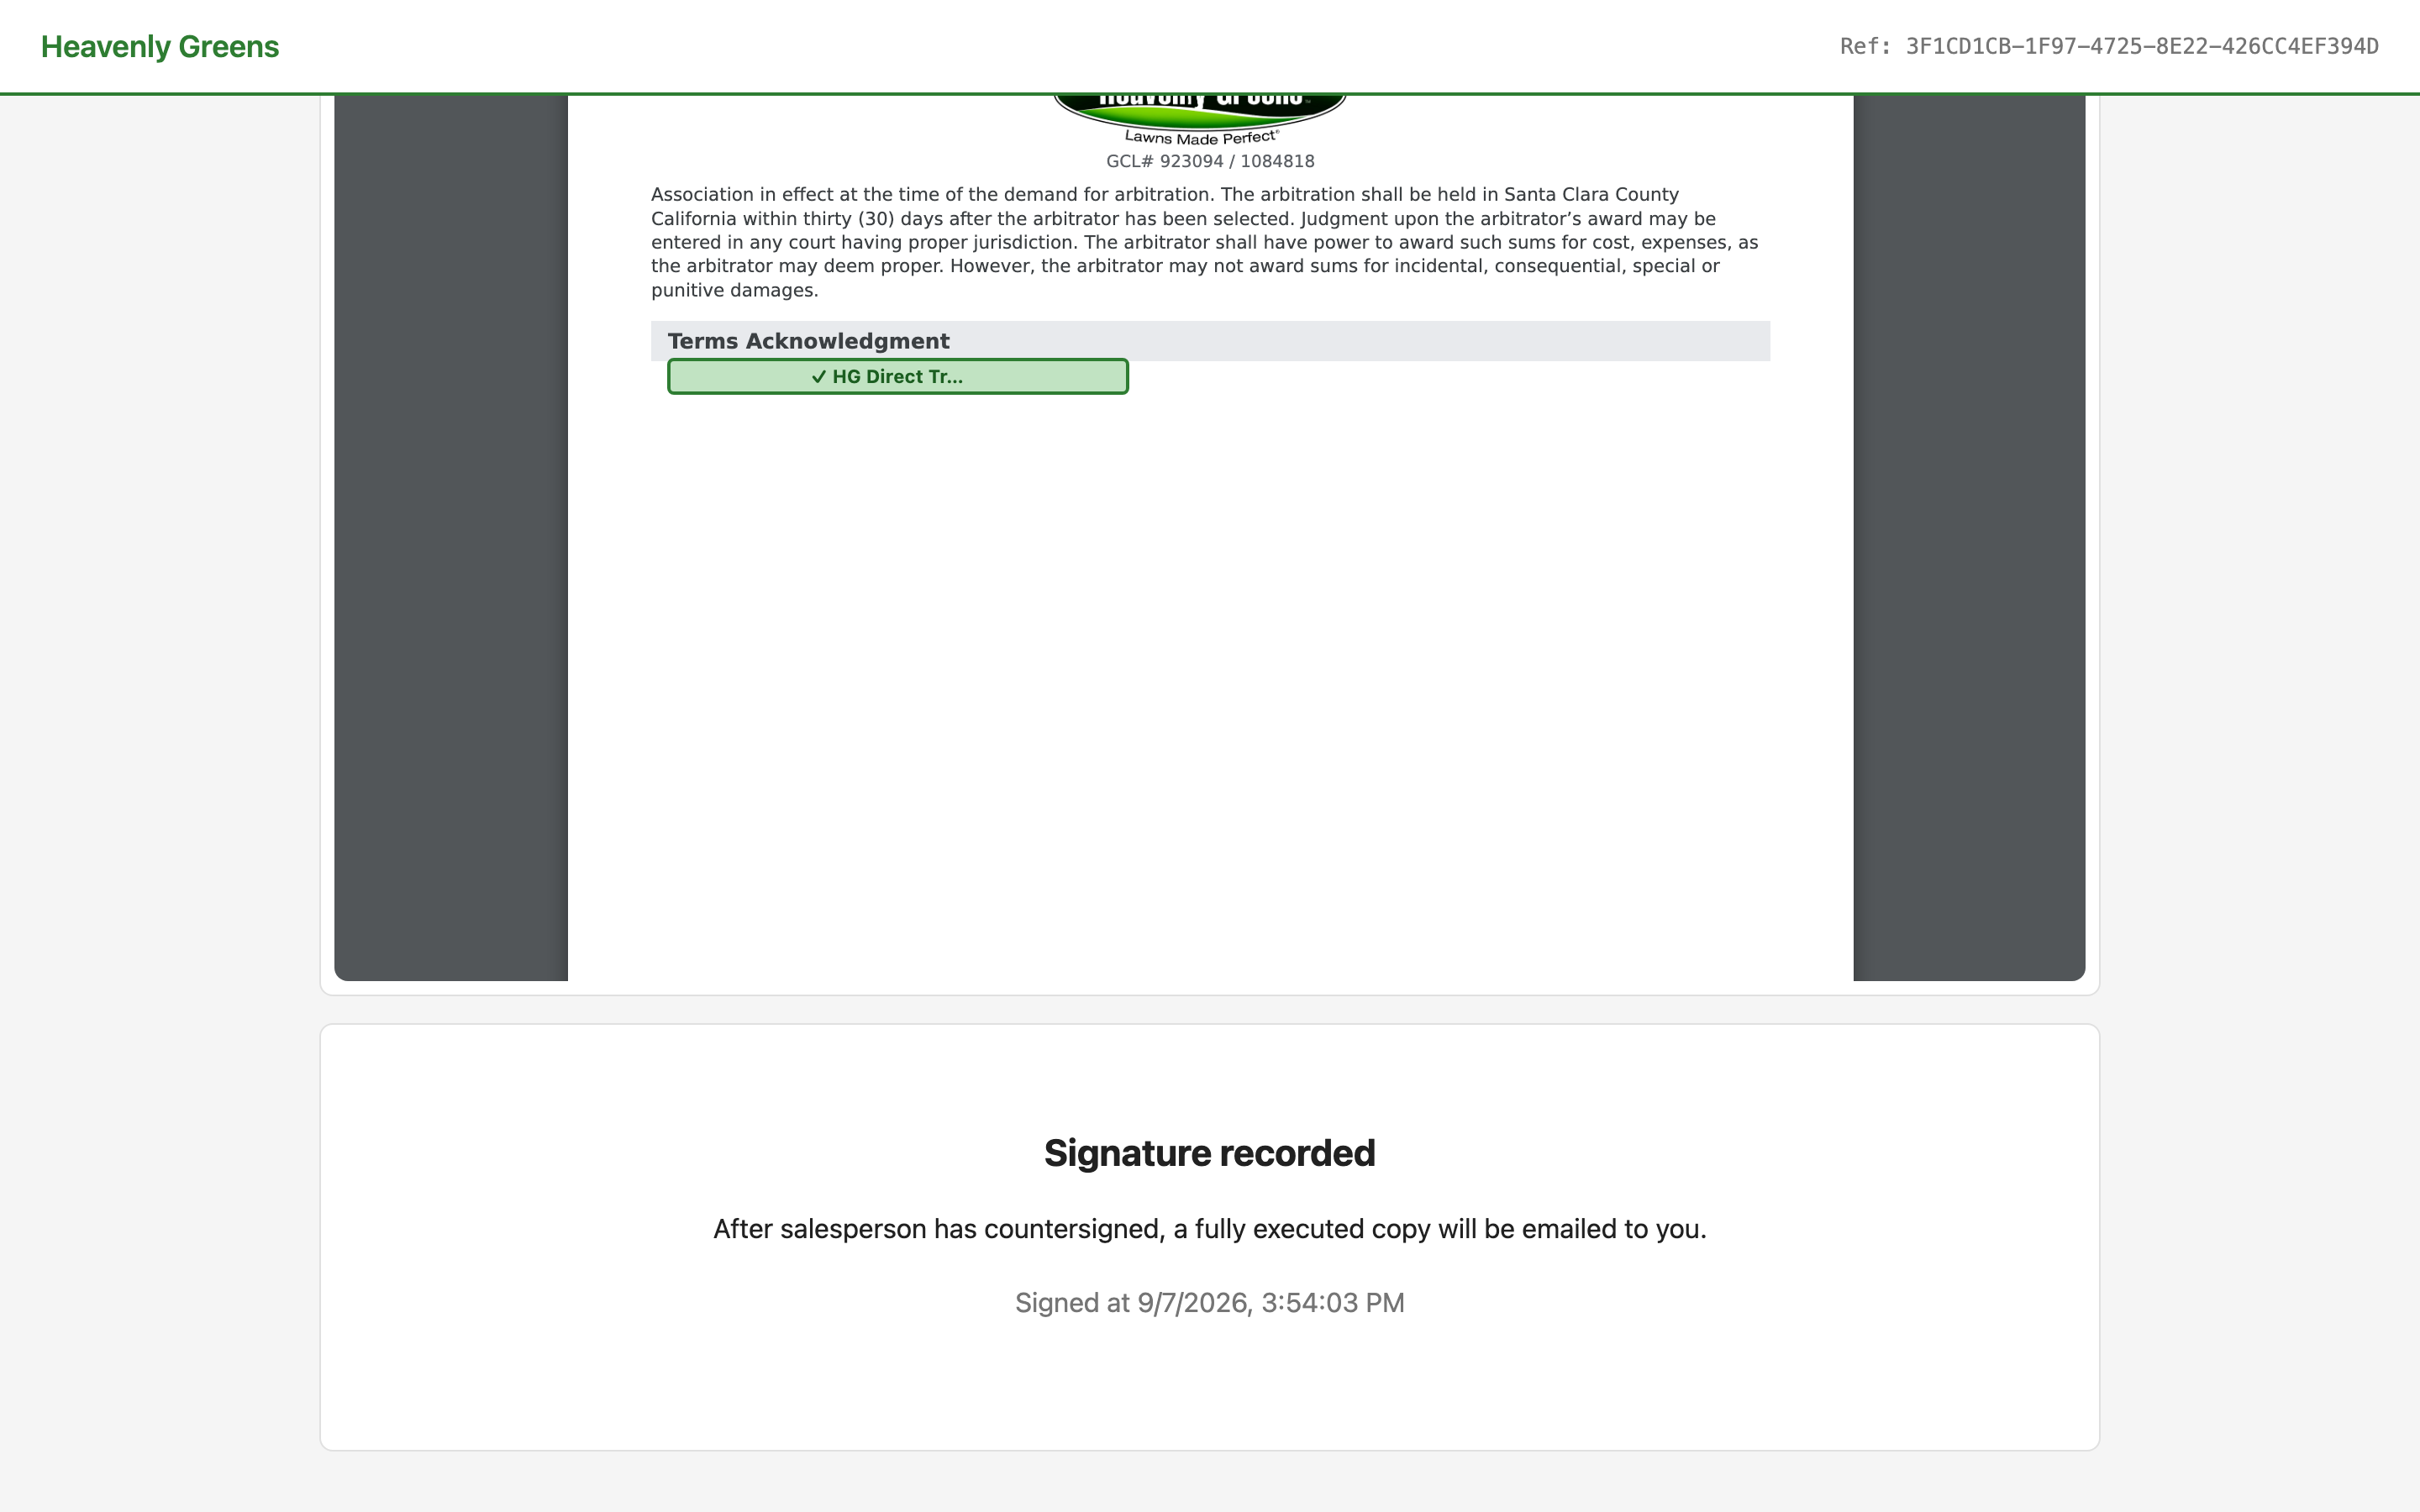
CUSTOMERDone: Signature recorded

After salesperson has countersigned, a fully executed copy will be emailed to you.

The customer's done page

Chapter 4: You countersign

Your signing copy arrives the moment the customer signs.

SALES REPOpen your signing copy: Final signature required

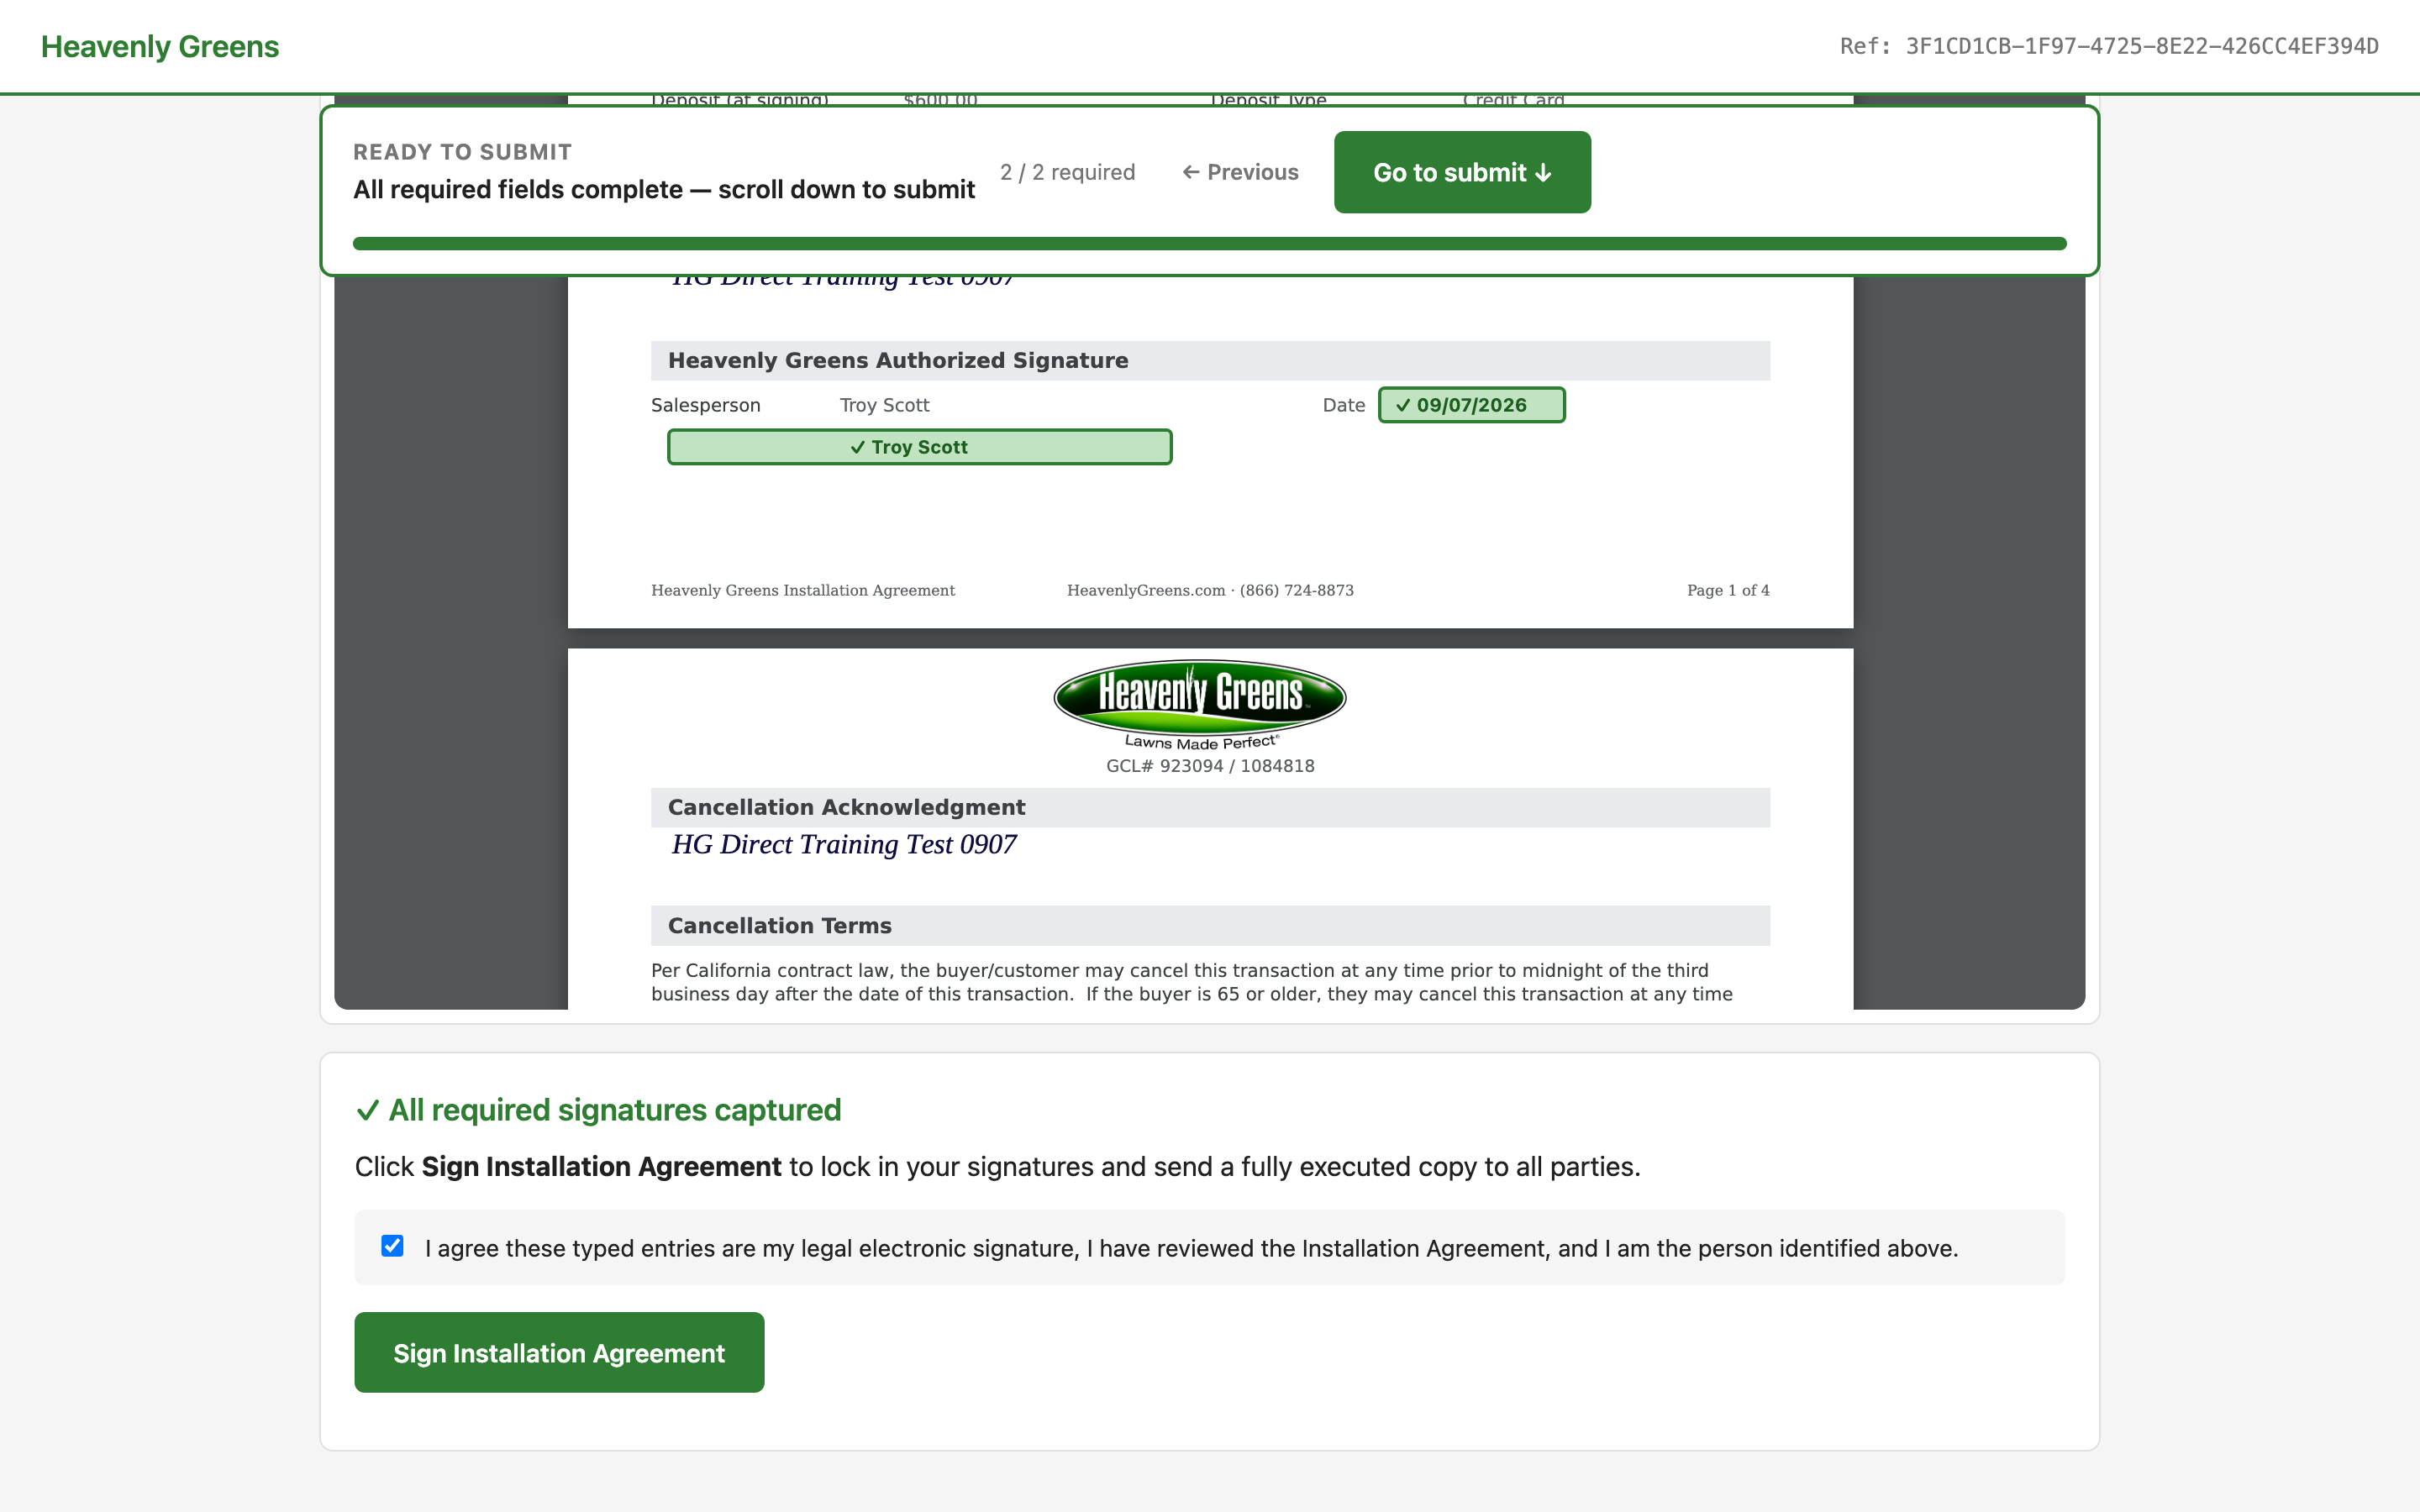
<customer> has signed. Review and add your signature to complete it. NEXT SIGNATURE: Salesperson signature, 0 / 2 → Take me thereConfirm ×2 → tick the e-signature agreement → Sign Installation Agreement.

Countersign page, ready to submit

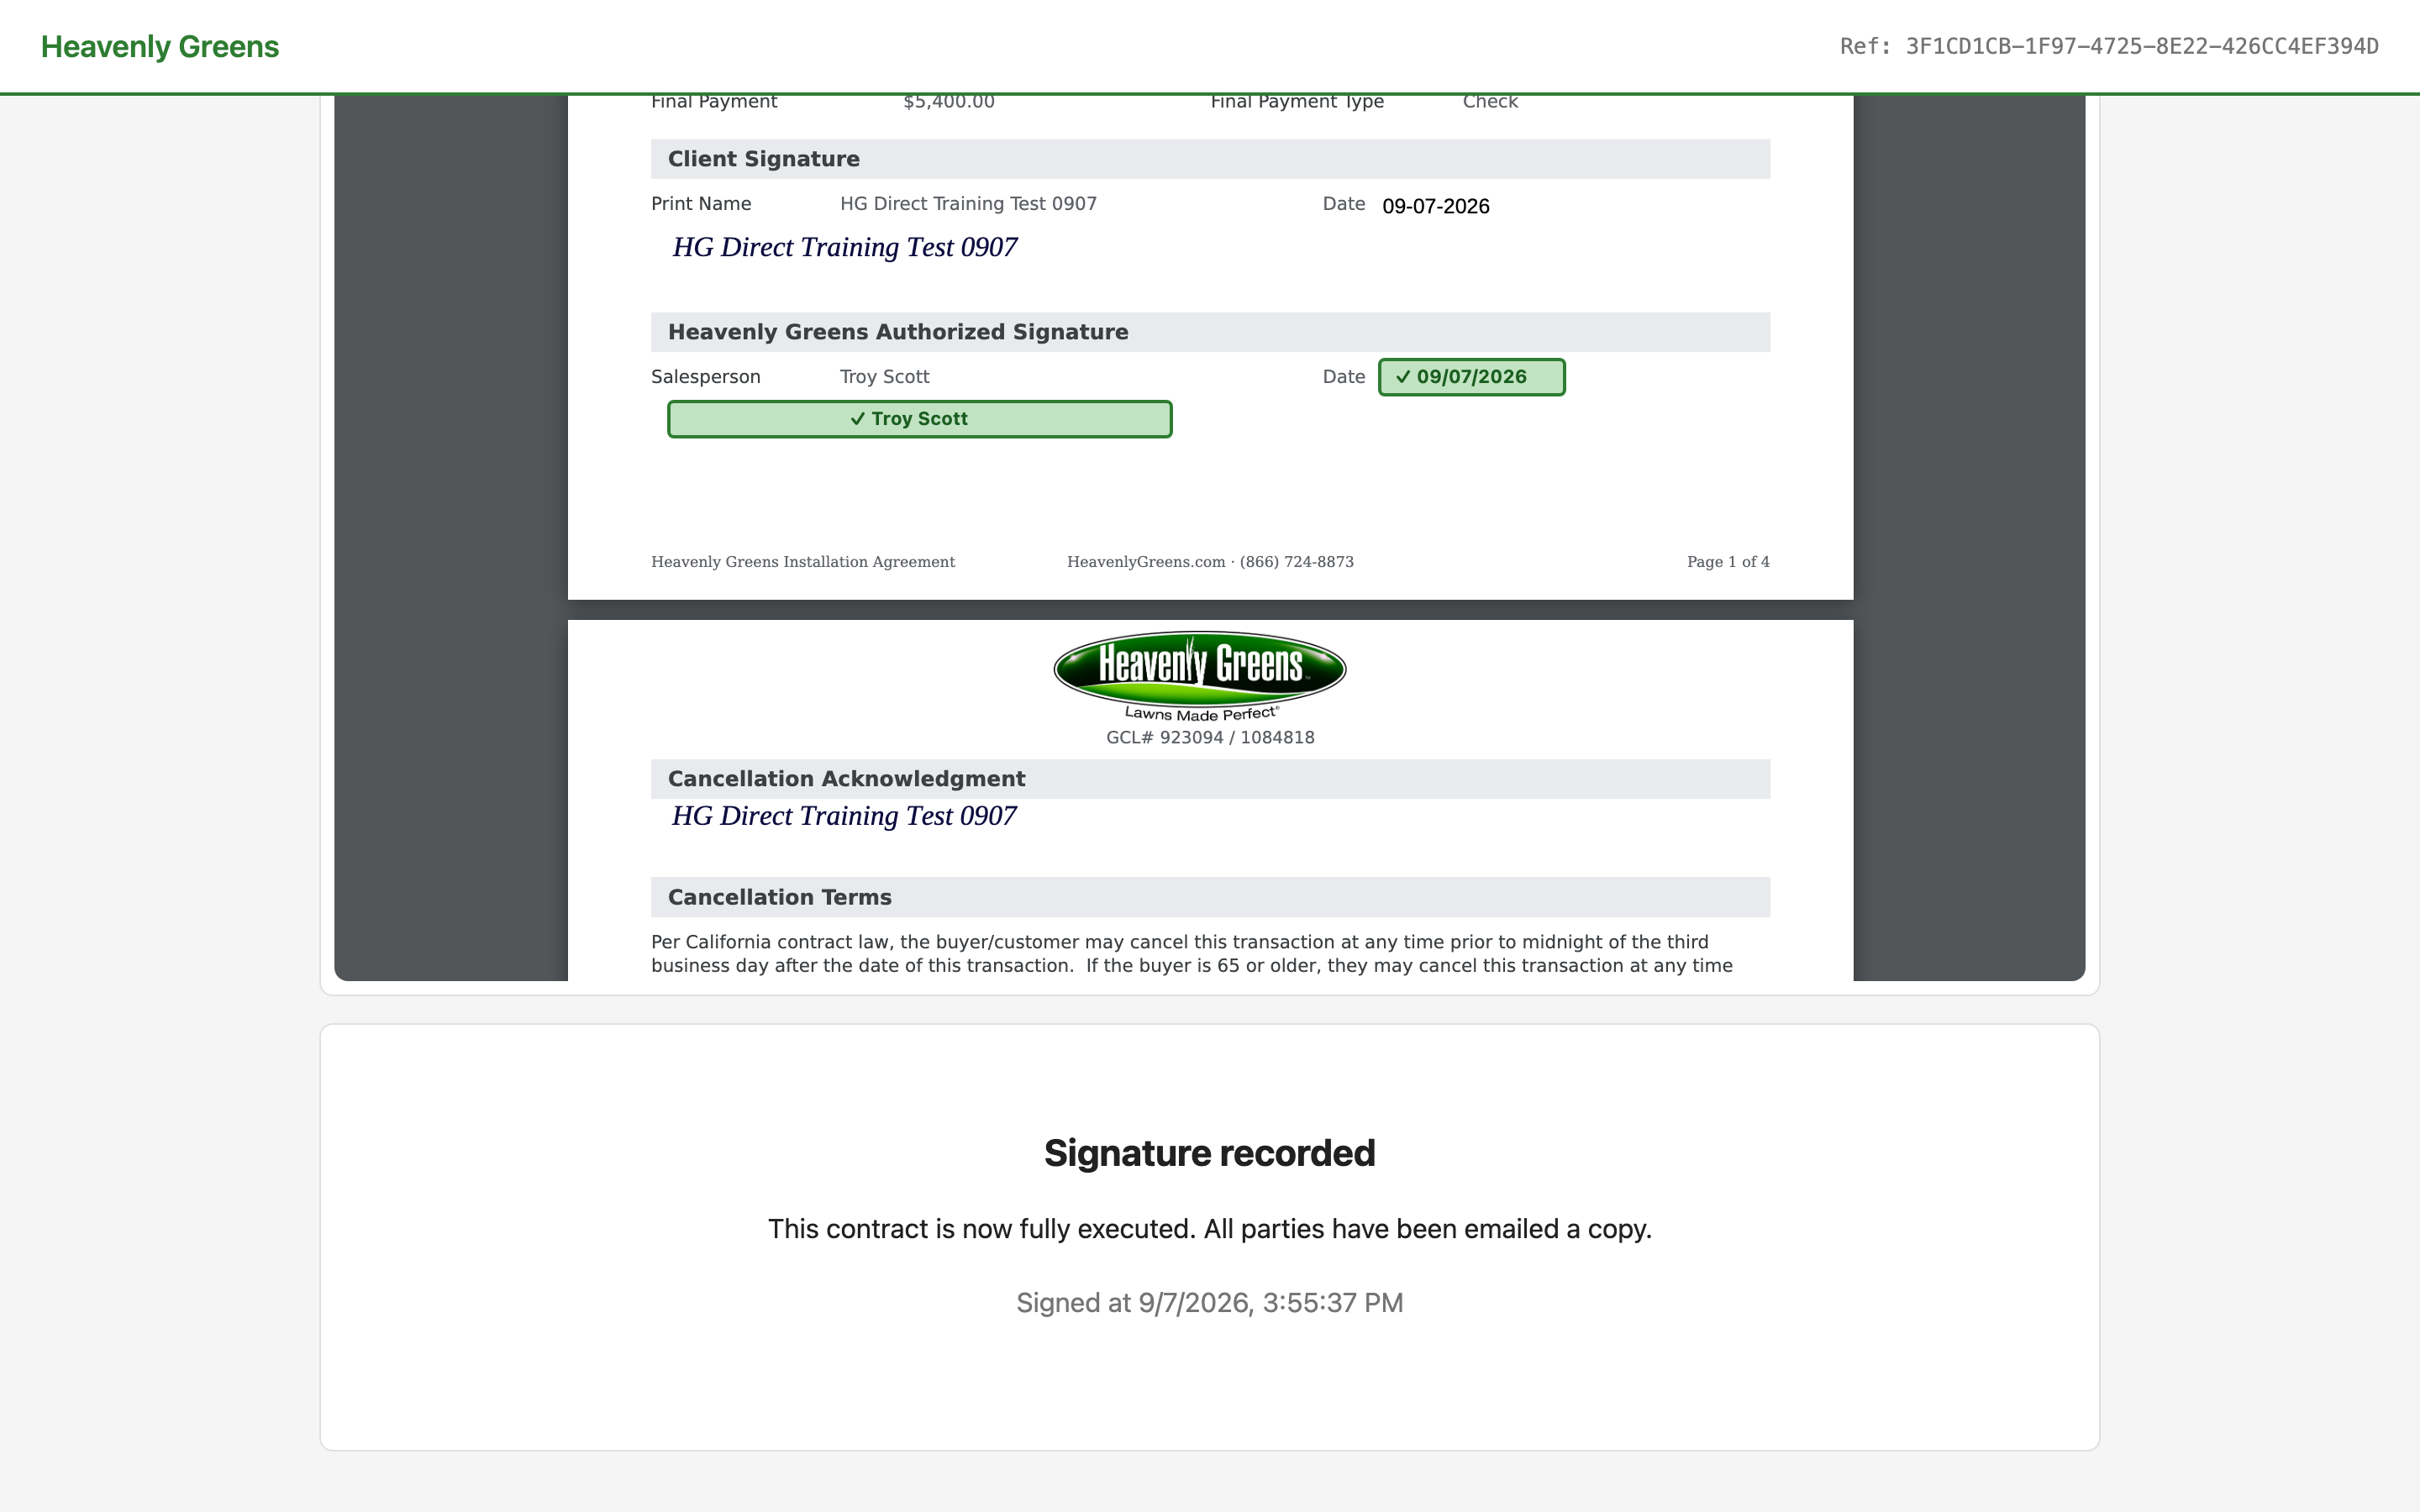
SALES REPThis contract is now fully executed. All parties have been emailed a copy.

The engine then creates the deposit invoice in AGM and sends the customer the pay link — nothing for you to do.

Countersign completed

Chapter 5: The customer pays the deposit

Automatic. You will see it land on the contact.

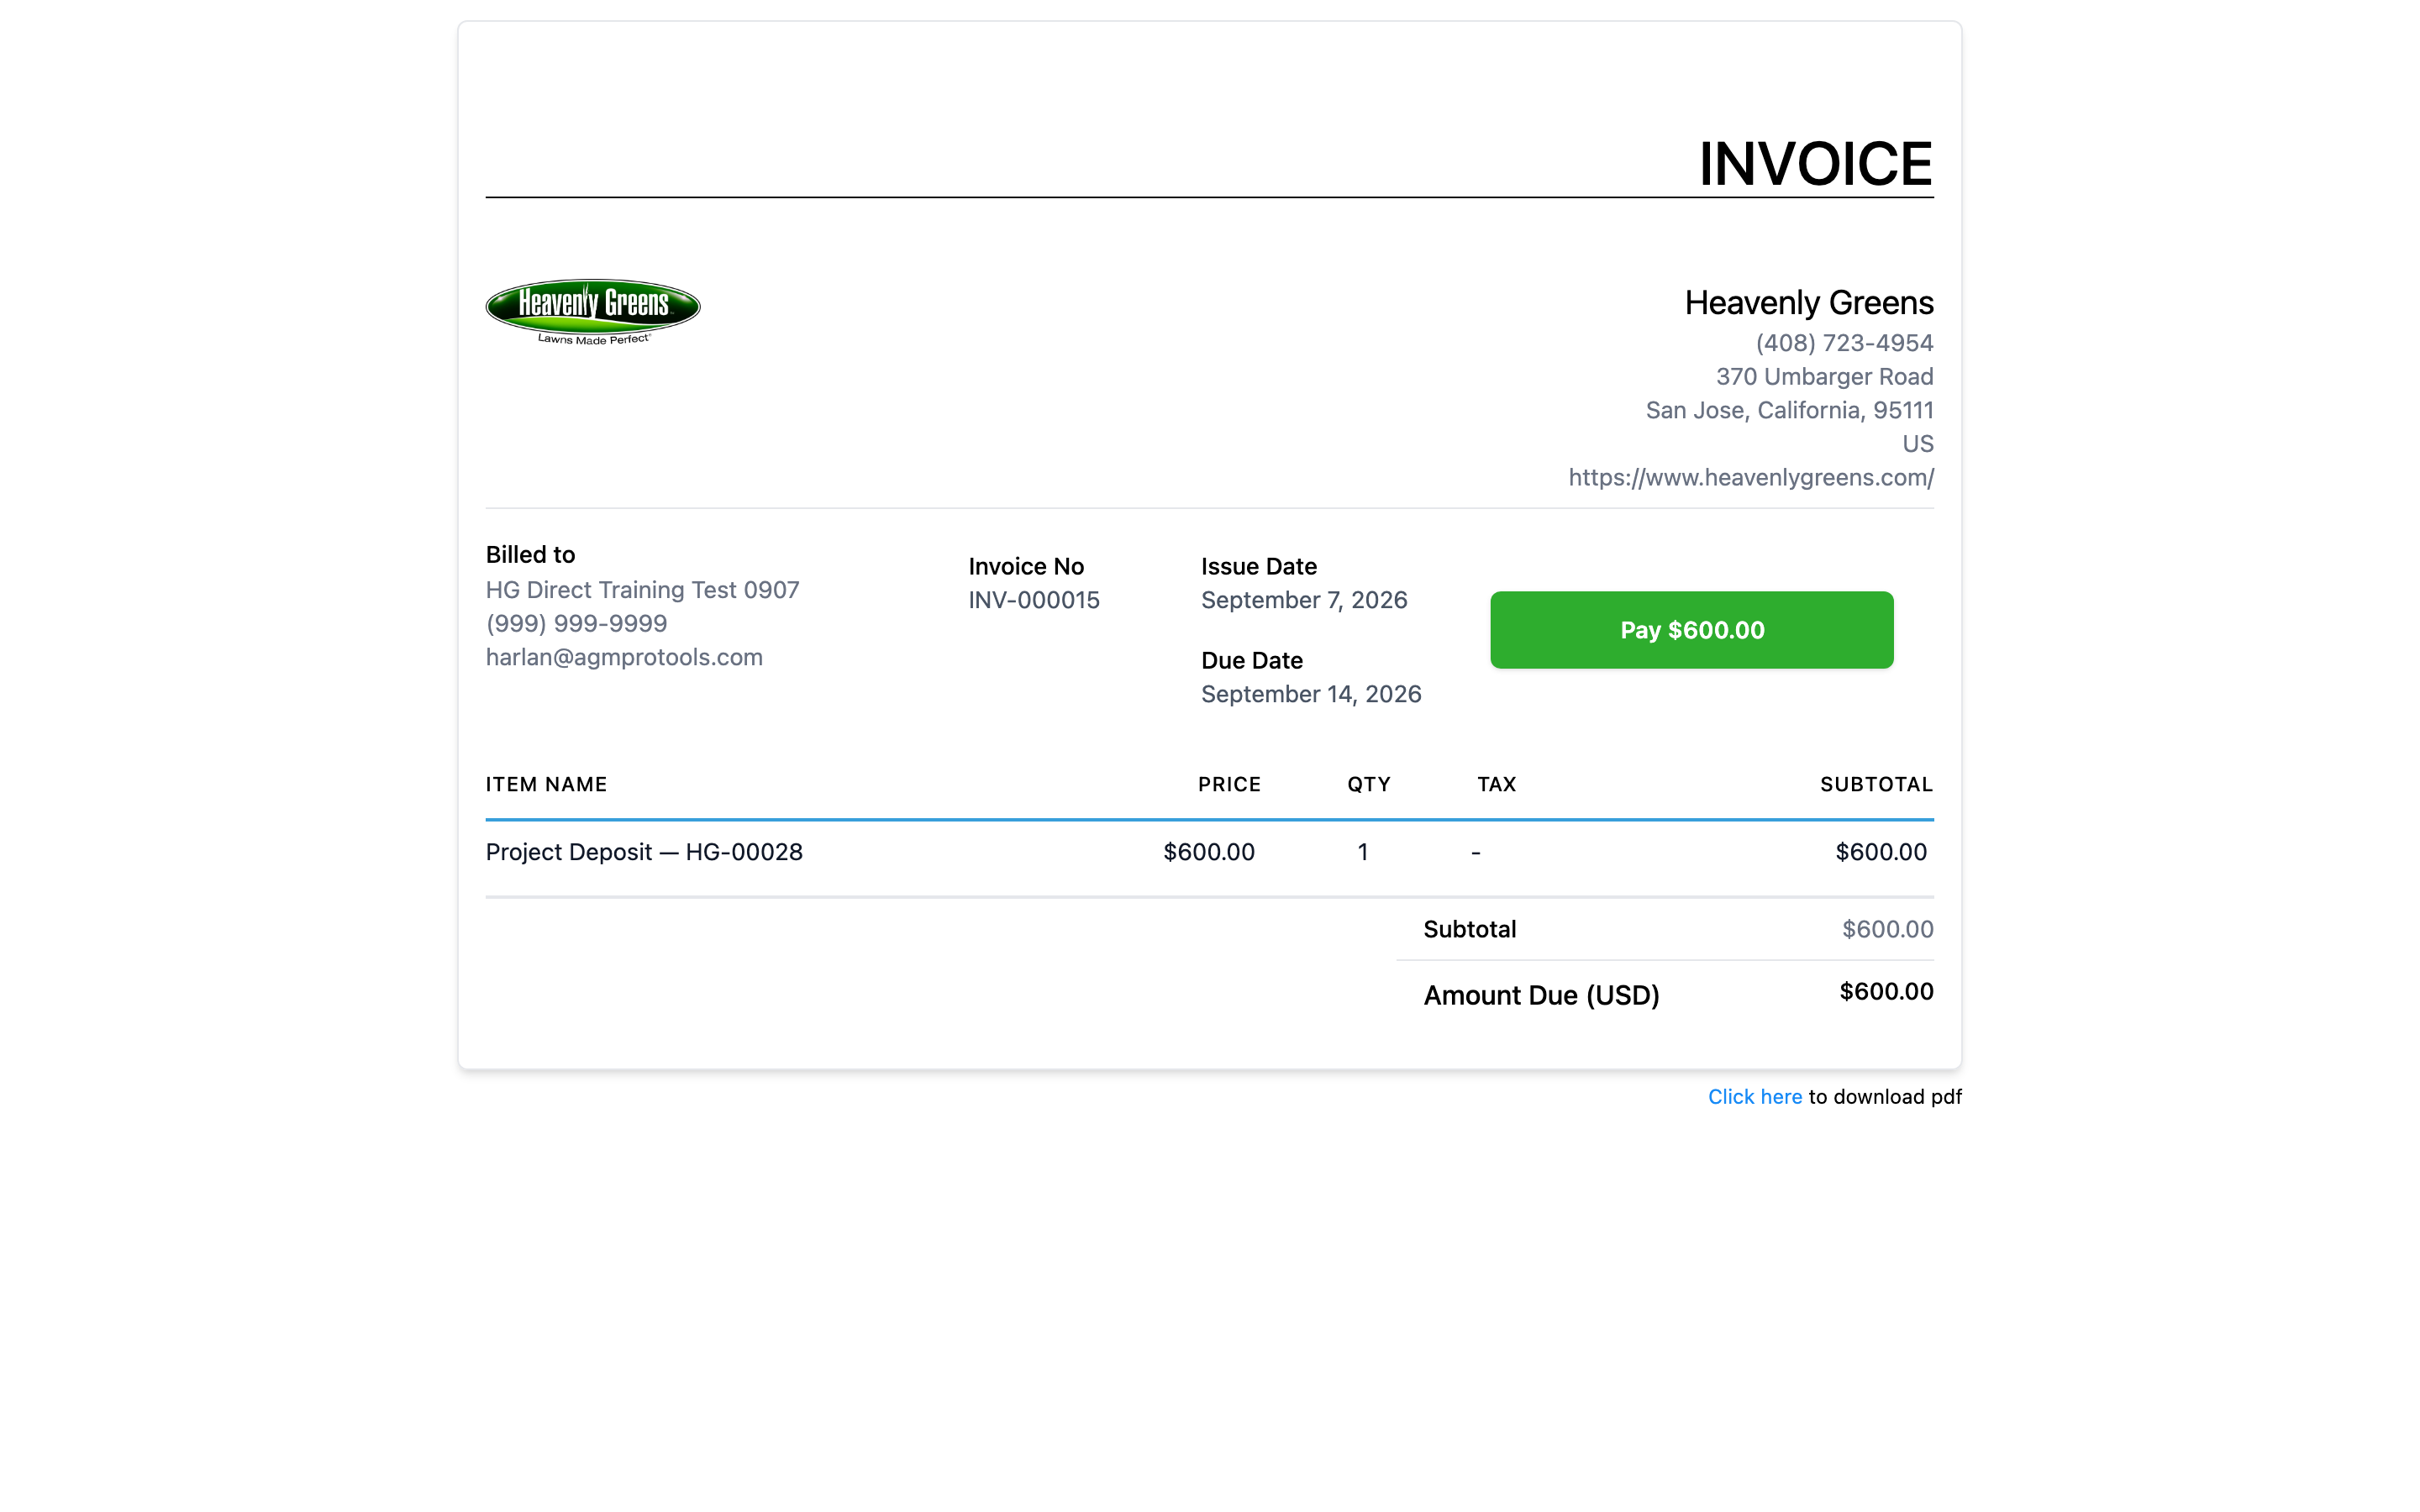
CUSTOMERThe deposit invoice arrives by email with a Pay link

From accounting@heavenlygreens.com: Heavenly Greens — Deposit (HG-000xx), due in 7 days. The hosted invoice page shows the deposit line and a Pay button.

The deposit invoice page

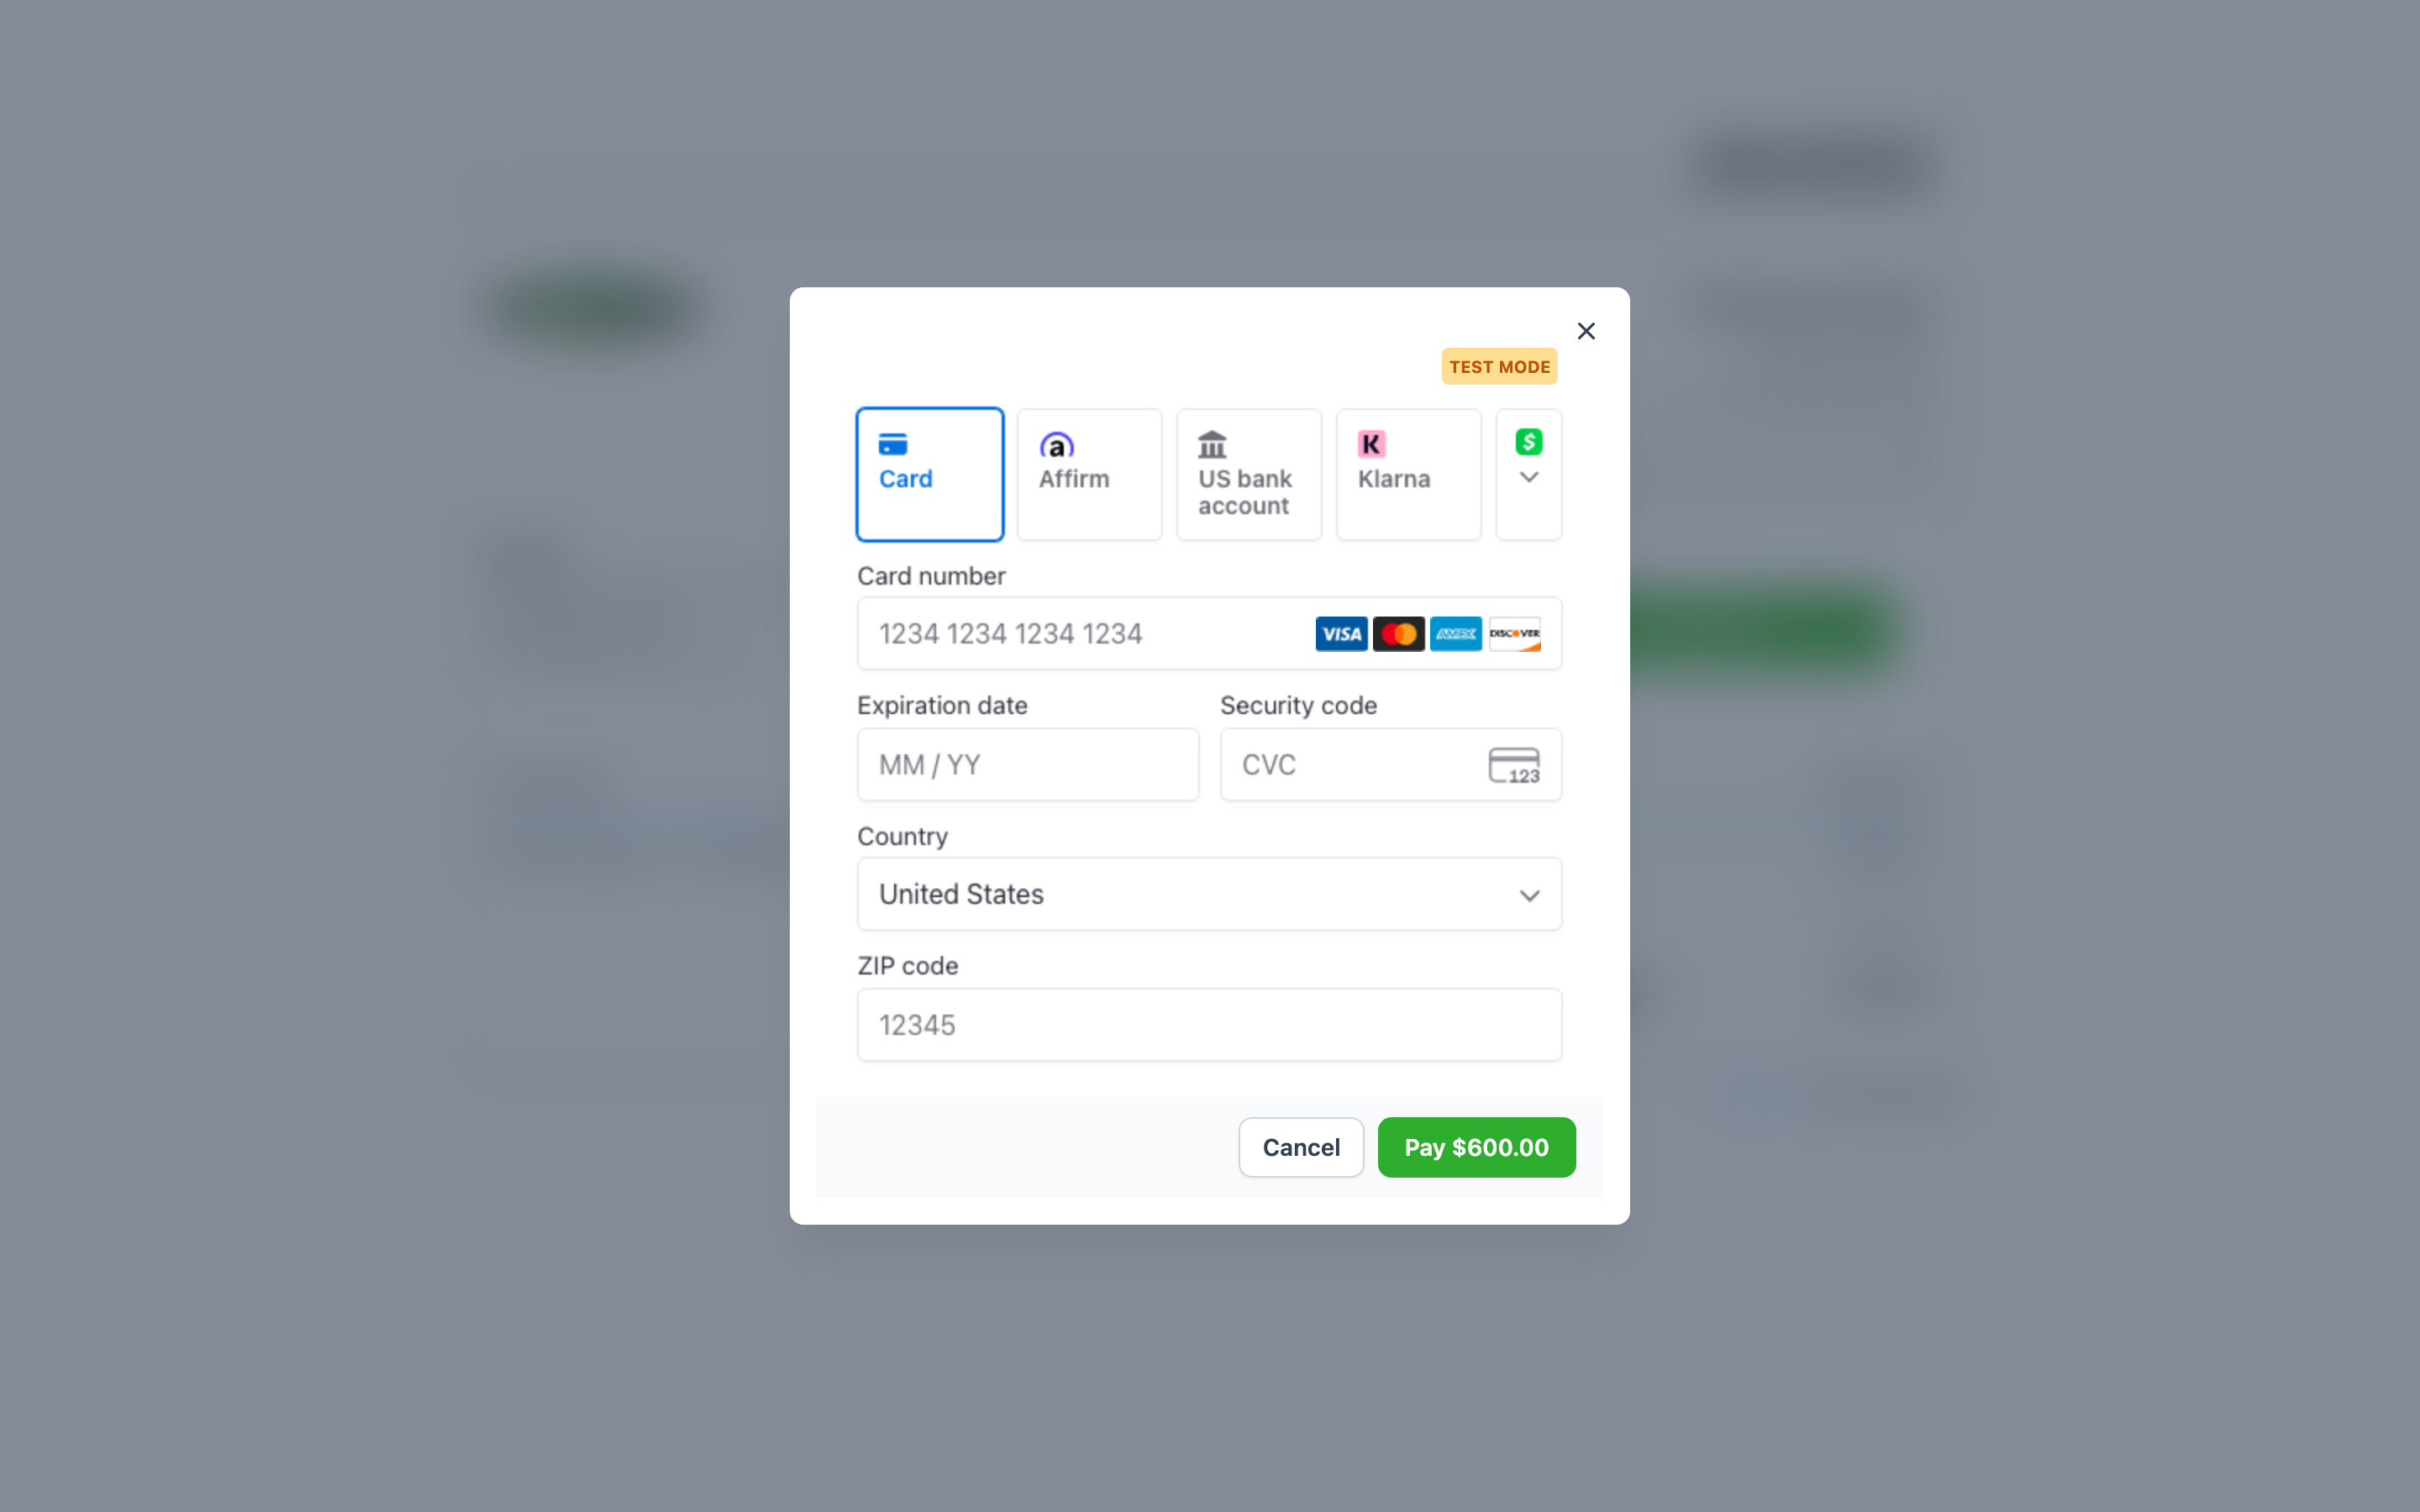
CUSTOMERPay by card

Press Pay → card form → pay.

The card form

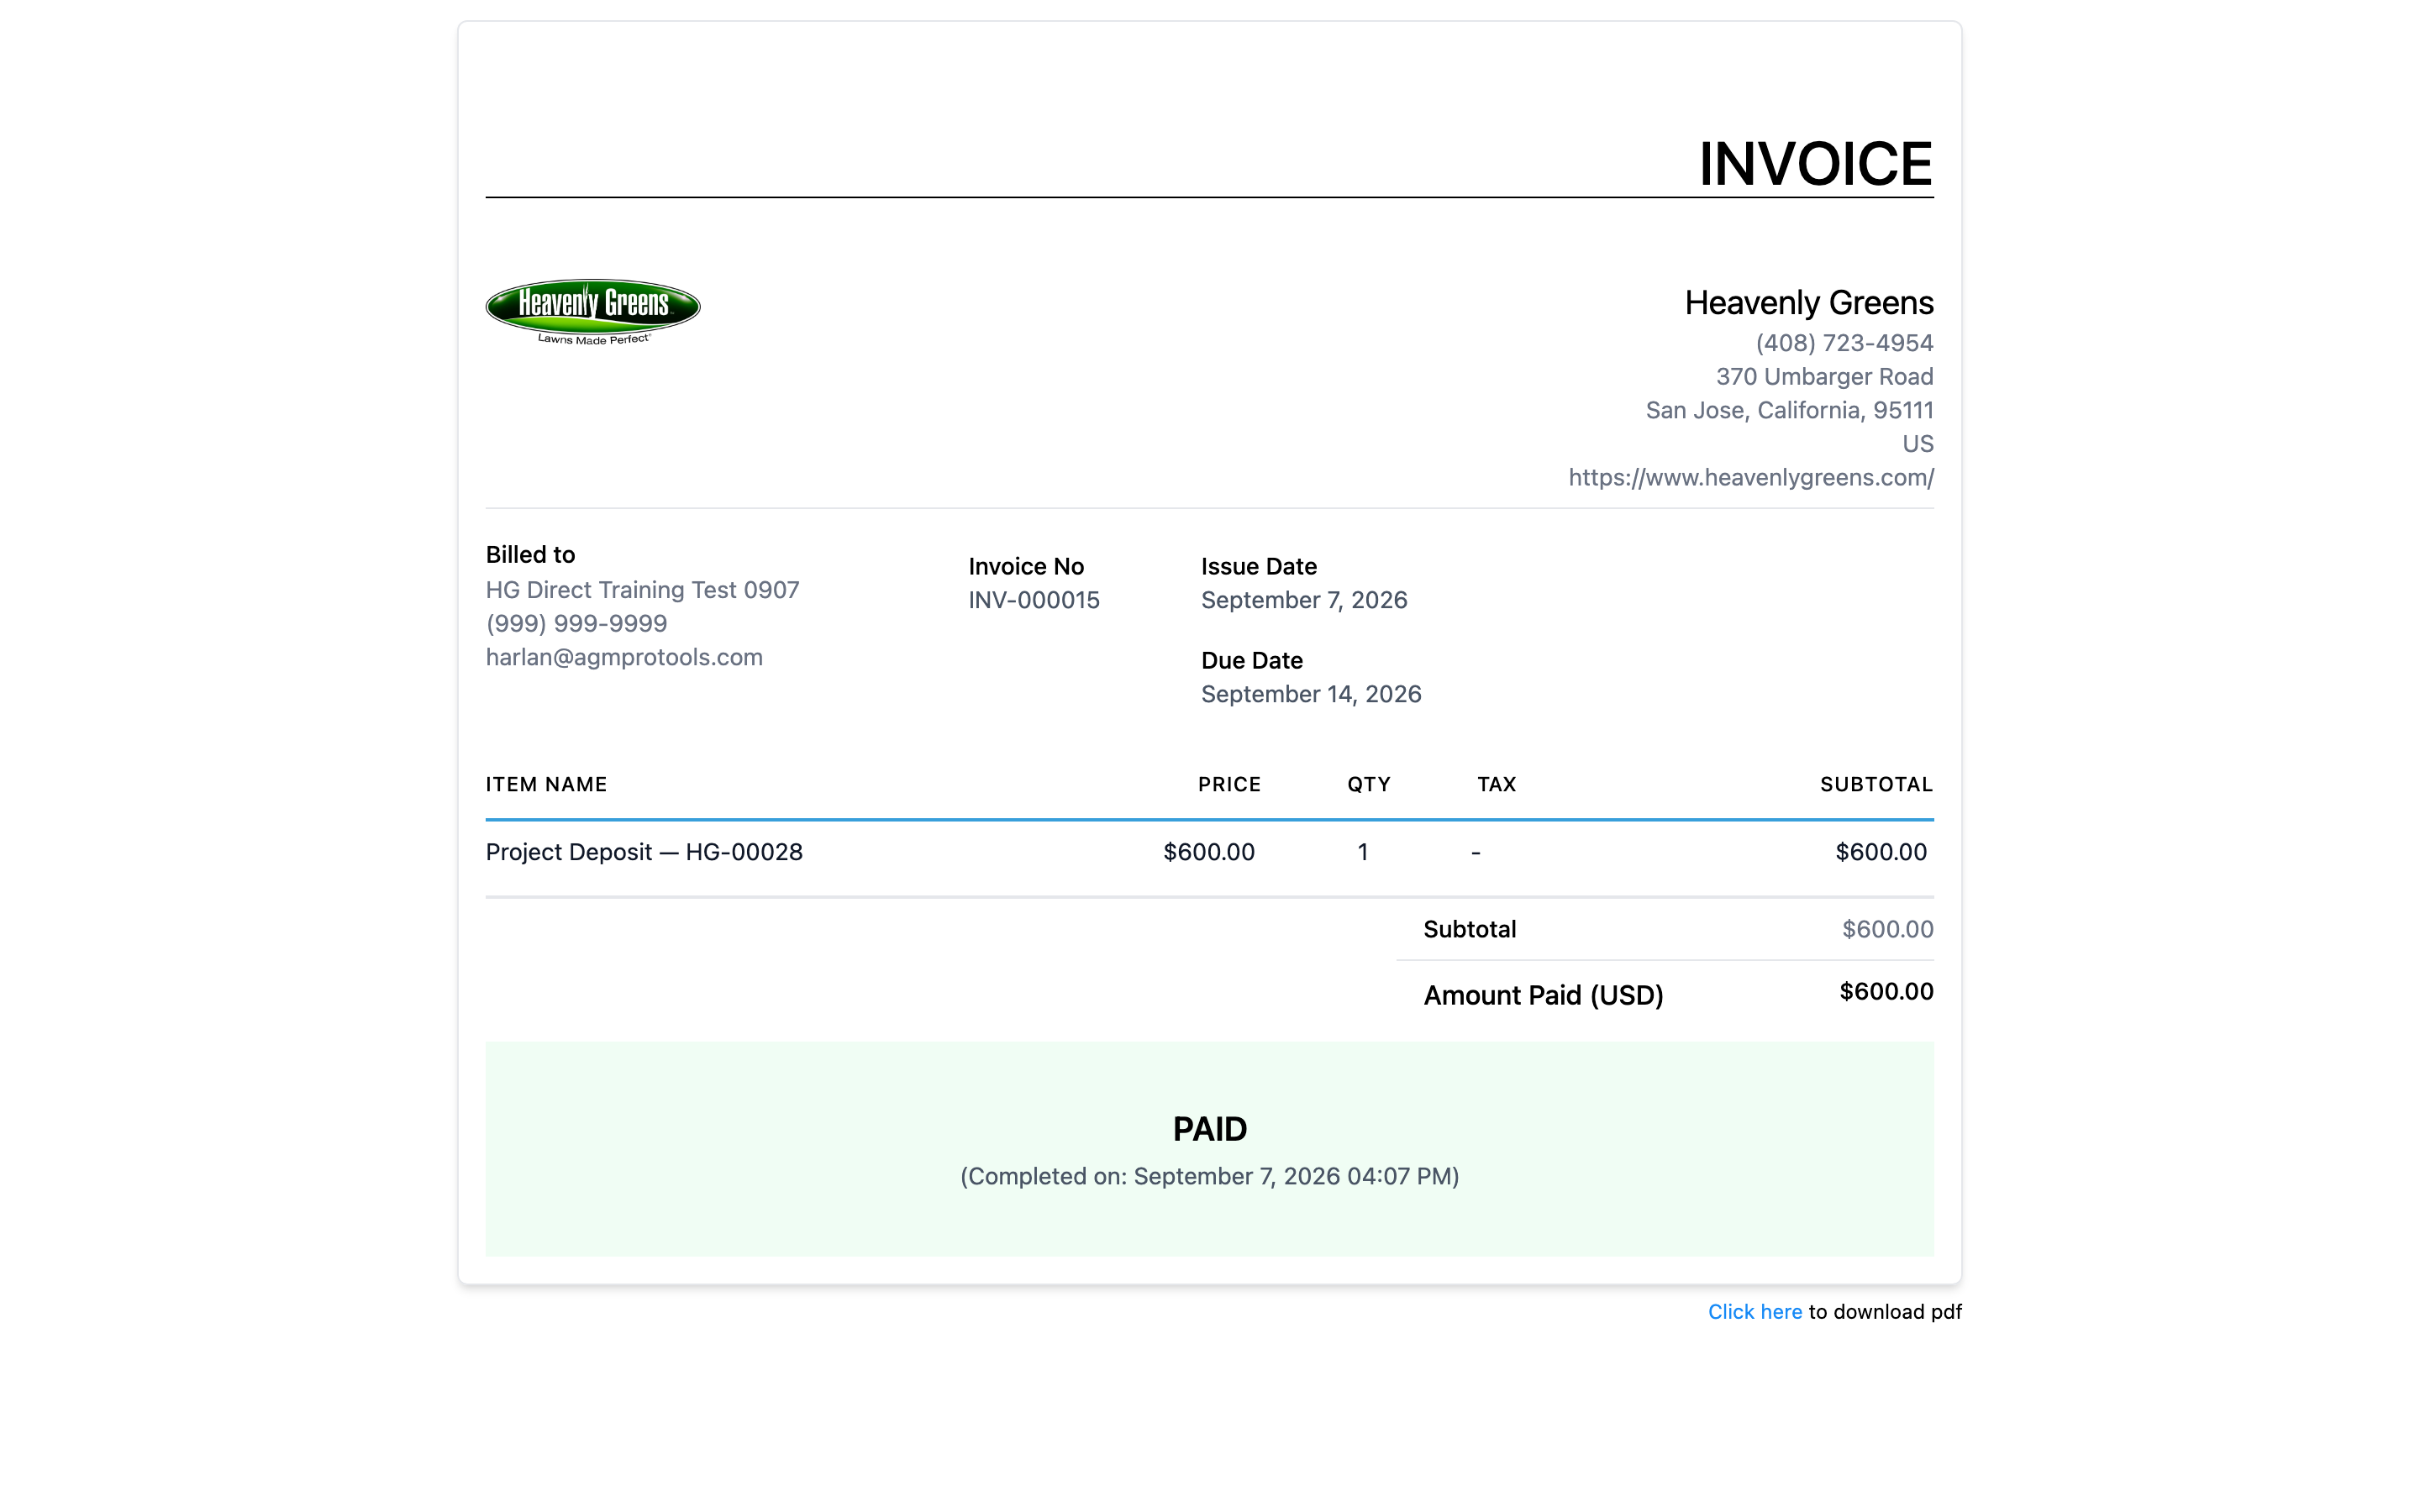
CUSTOMERThe invoice shows PAID

Completed date and time, amount paid, PDF download. The customer is also emailed the executed contract, the invoice and the payment receipt.

Invoice paid state

Chapter 6: What lands back in AGM for you

The whole story on the contact, without opening anything else.

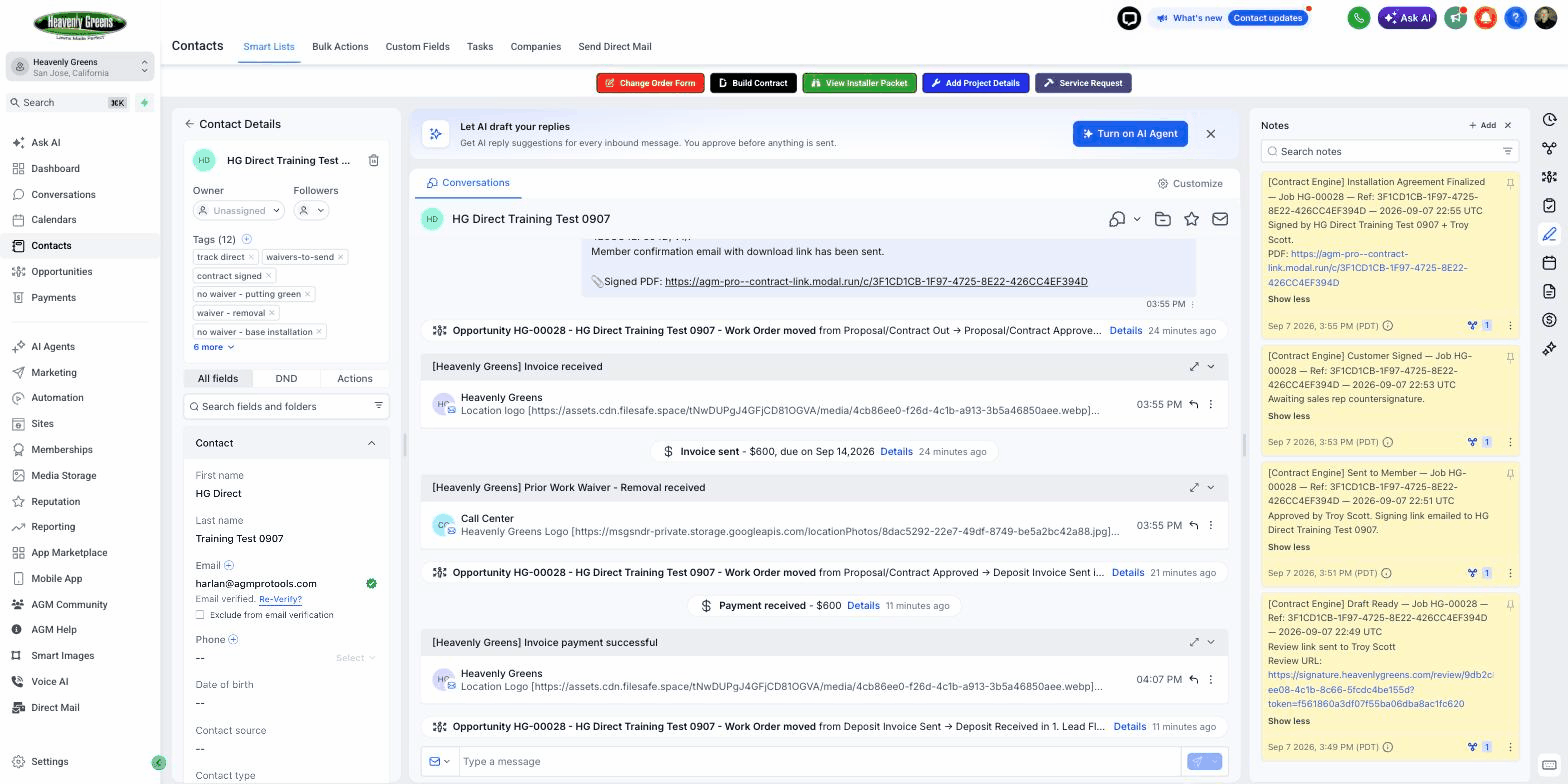
BACK IN AGMThe Conversations timeline

Opportunity created → Customer Signed → Installation Agreement fully executed → thank-you email → New Invoice Sent → the ticked waiver went out automatically → Deposit Invoice Sent → Payment received → Deposit Received.

The Conversations timeline on the contact

BACK IN AGMThe Notes panel

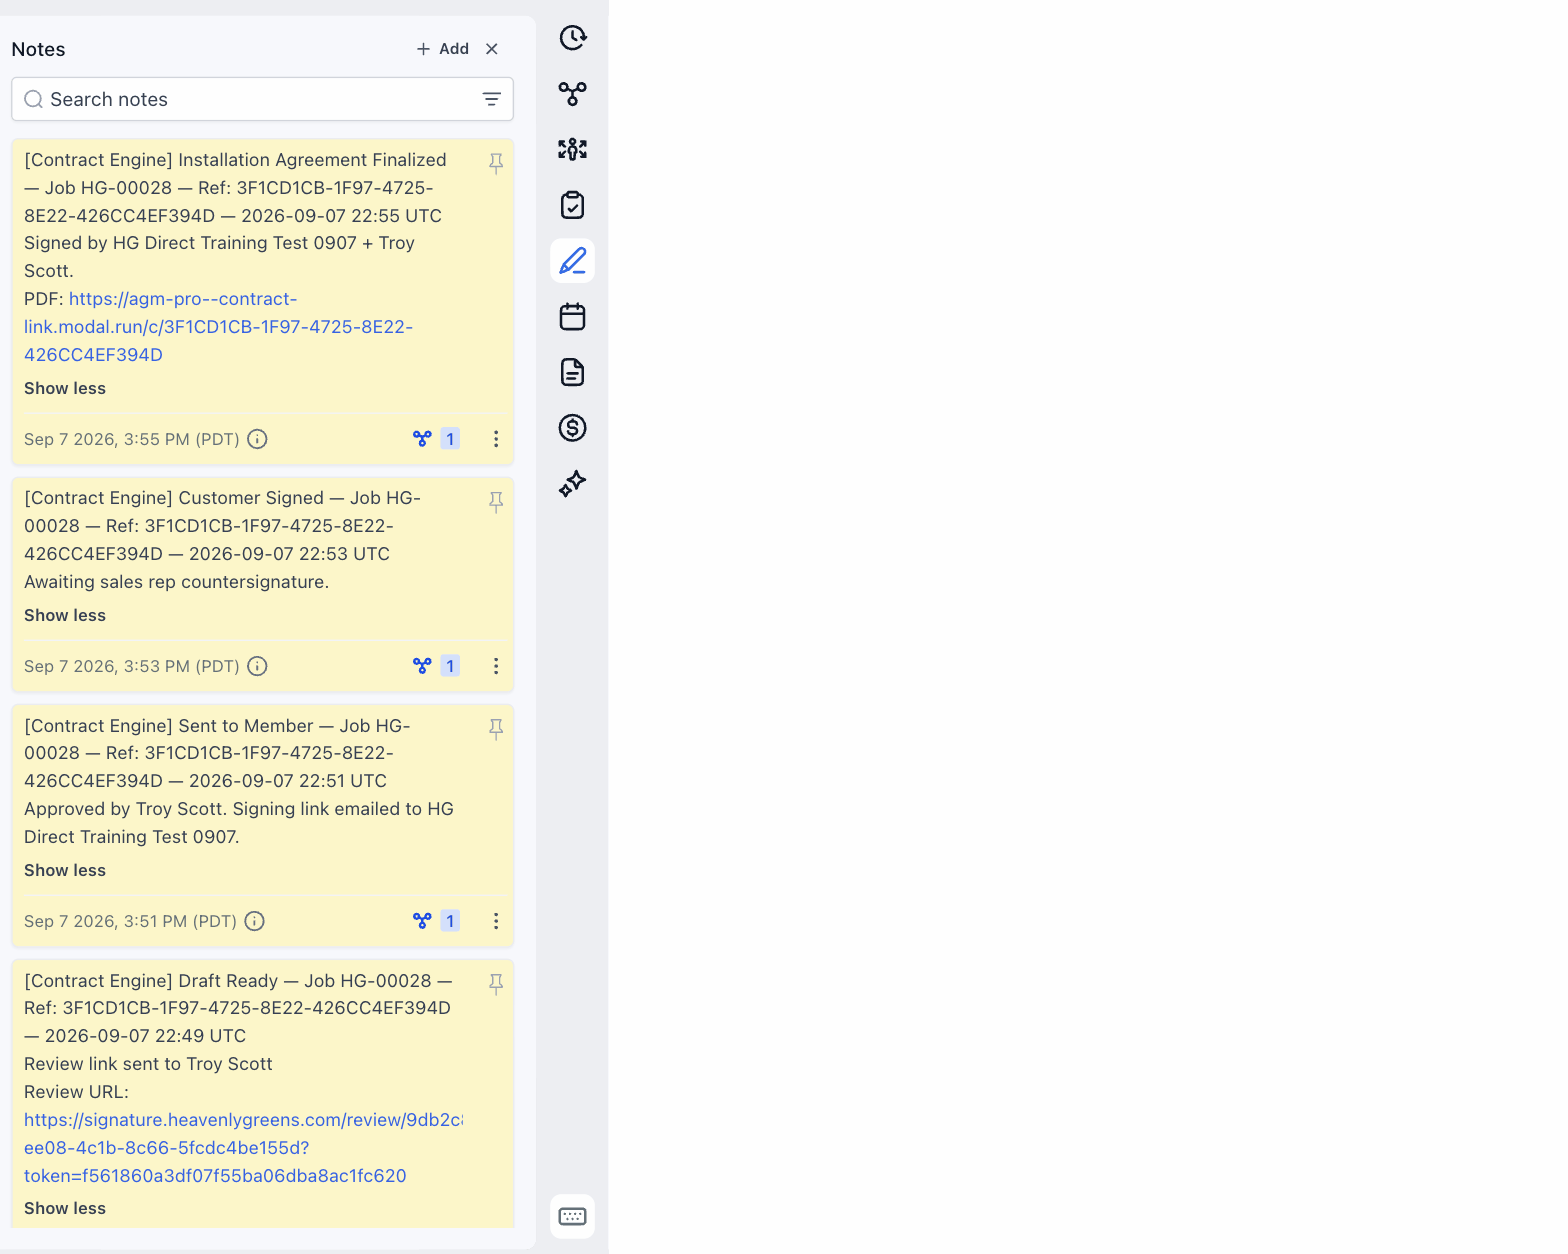
Draft ready (review link), Sent to Member, Customer Signed, Installation Agreement Finalized with the signed PDF link.

The Notes panel

BACK IN AGMThe opportunity card sits in Deposit Received

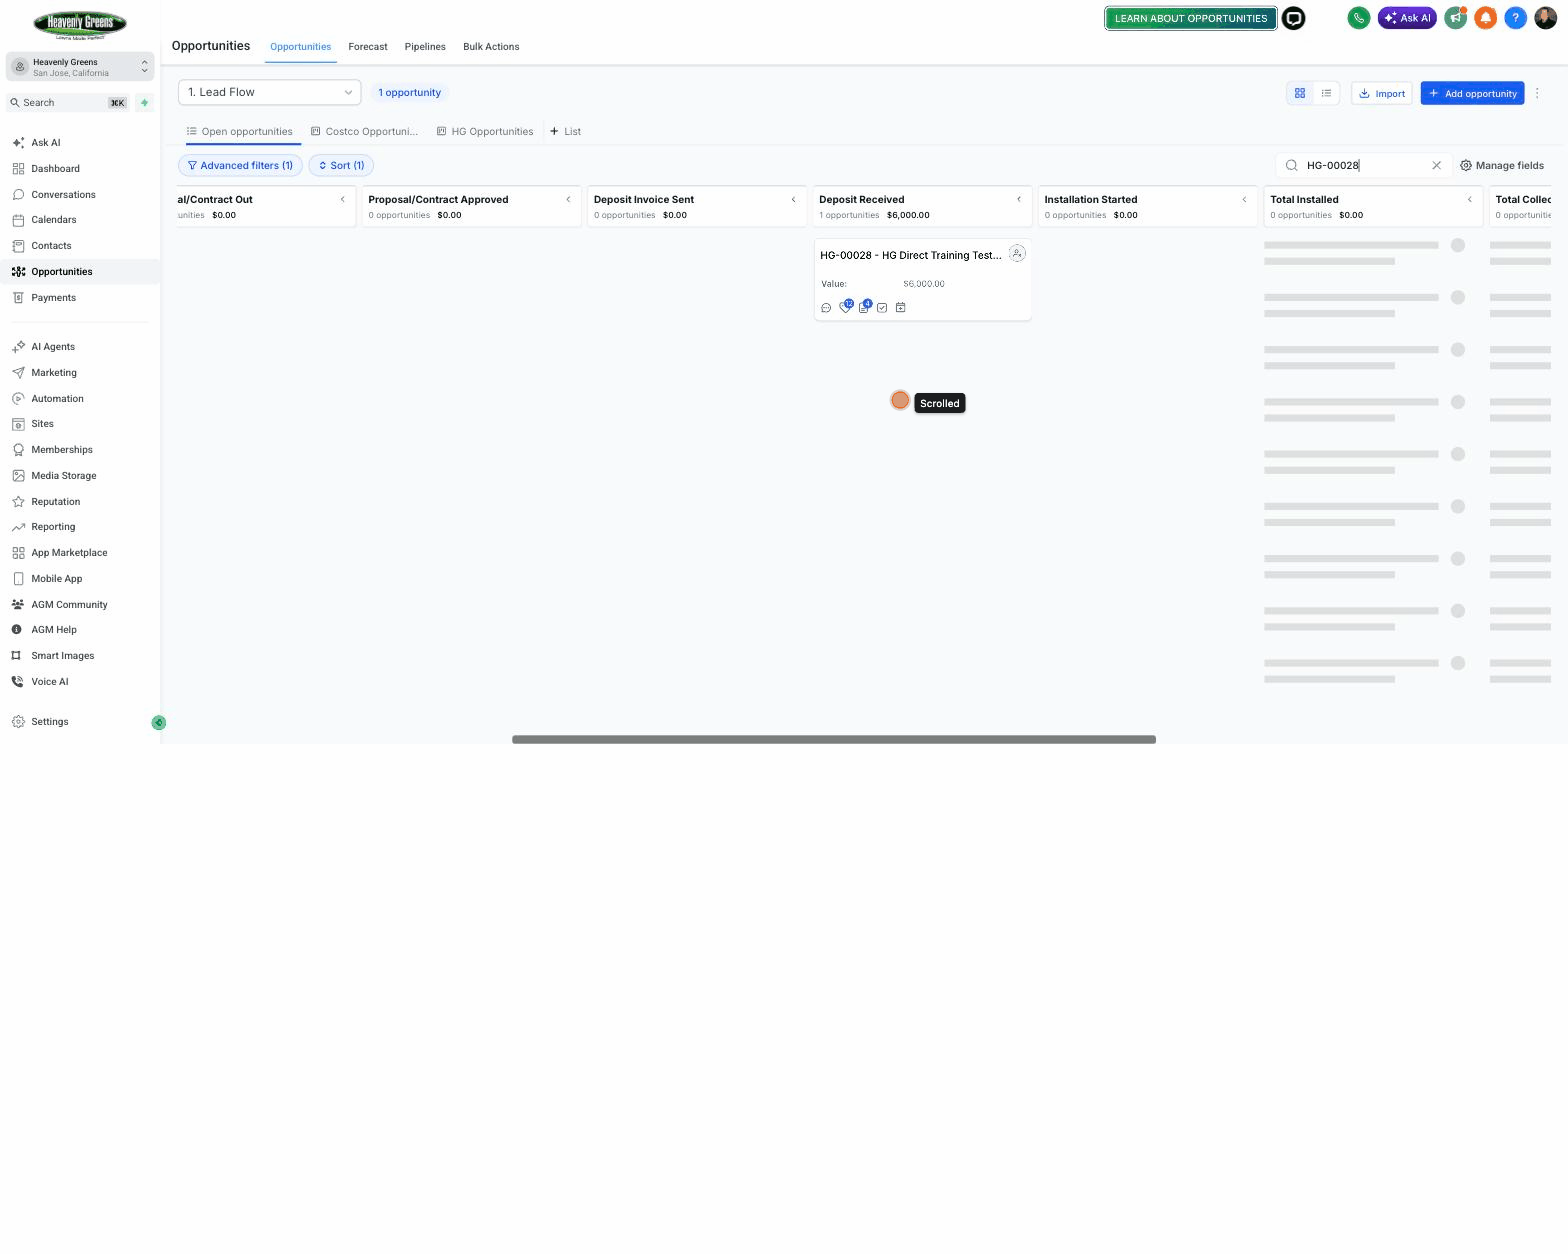
Opportunities → 1. Lead Flow: the HG-000xx card now shows the contract value in Deposit Received, and installer-packet prep has fired.

The pipeline card in Deposit Received